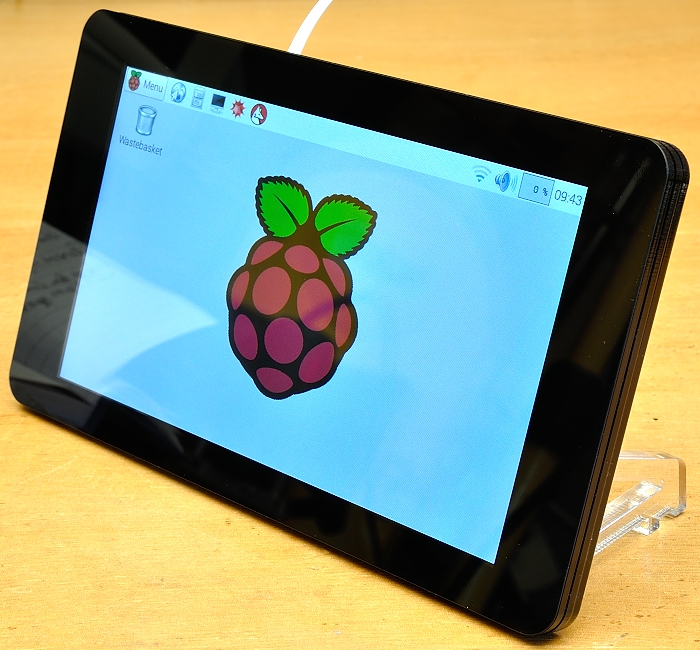
The official 7 inch DSI Raspberry Pi screen is now launched and available for purchase. It’s been a long time in the making, but the B+, the A+ and Pi2B have all been responsible for pushing this display to the back-burner.
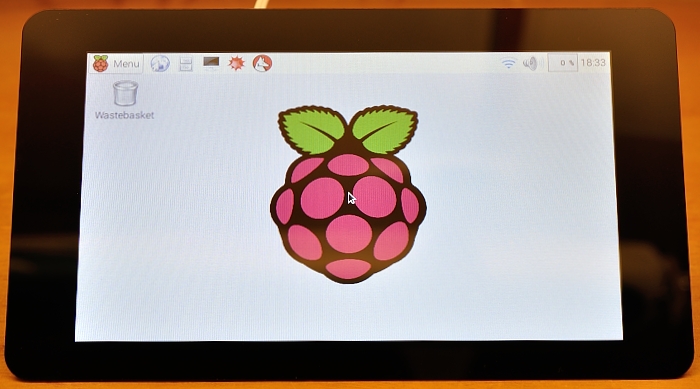
When there finally was some ‘engineering time’ to get on with it, hurdles were faced with EMC compliance and chip availability. But those hurdles are now overcome and the screen is now launched. And it looks great (click any photo for higher resolution).
Video Overview
Here’s a video overview. There’s more detail in the text below…
Killer Features?
- Fantastic price
- Capacitive Touch
- Uses DSI connector
- Can Power a Pi from the driver board
Fantastic Price
It’s going to retail for around £50, depending on where you buy it. The official headline price is $60 + shipping and local taxes. For a long time I’ve thought it would be awesome if there was a decent screen available for the Pi at the £50 price point. Now there is.
It Has Capacitive Touch
It has capacitive, 10-finger touch. This will be most useful in applications where people want to create their own graphical user interface (GUI). It will enable the Pi to be used for controlling all manner of systems with no need for keyboard or other interface peripherals. Touch works in LXDE if you update/upgrade on the latest Raspbian.
sudo apt-get update && sudo apt-get upgrade
Note that there is no ‘pinch to zoom’ like you have on tablets. (There would need to be GPU accelerated X for that.)
Uses DSI Connector
Because it uses the Pi’s DSI connector, you can still drive another display from the same Pi at the same time. This can be either composite or HDMI. You’ll see a demo of this in the video.
Can Power a Pi from the Driver Board
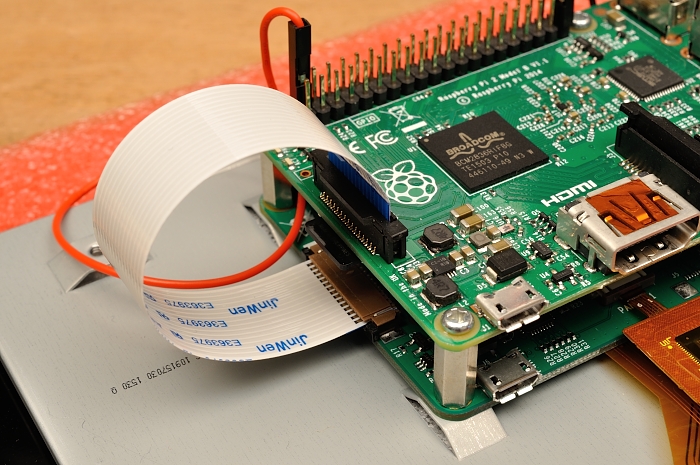
As long as you are using a decent power supply and connector lead(s) you can run a Raspberry Pi and the DSI screen from just one supply. You can power the Pi via GPIO jumper leads, the USB power port on the driver board, or separately.
What Are The Specs?
- 800 x 480 WVGA
- 7 inch
- 10-finger capacitive touch
- 24 bit RGB industrial quality display with wide viewing angle
- Viewable screen dimensions 155mm x 86mm
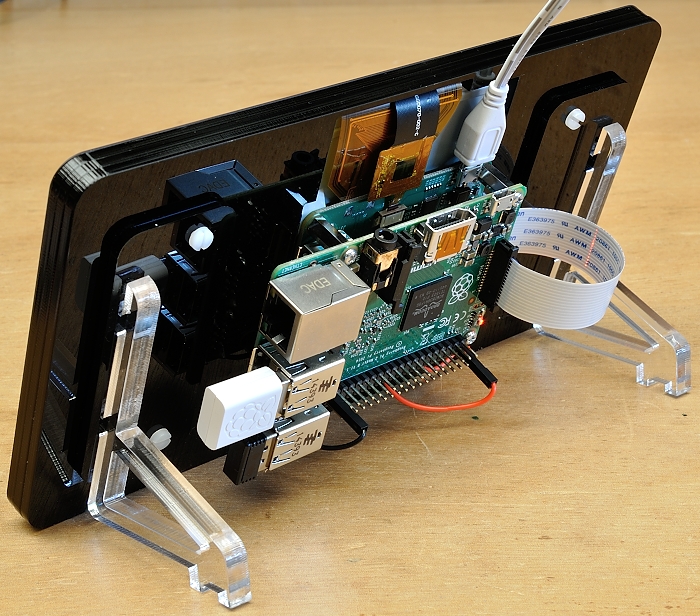
- Overall dimensions 194mm x 110mm x 20mm (35mm with a Pi2B attached)
- Weight (I measured this) 277 g
- Power consumption (I measured this) 2.23 Watts
What’s It Good For?
Apart from pretty much any application where a 7 inch screen is a good size, I think it’s going to be perfect for…
- point of sales (POS) displays
- control panels
- Pi-based cameras
- in-car systems
- applications needing a clean, simple, controlled user interface
- digital photo frames
- dual-screen setups
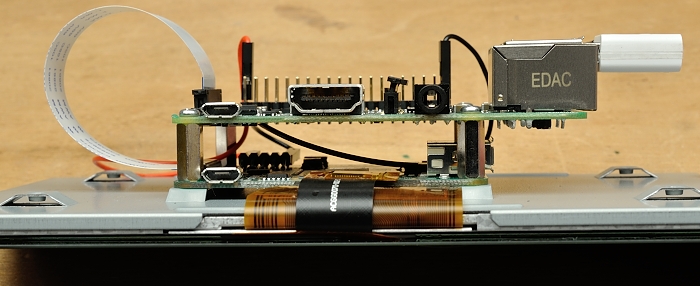
And someone’s bound to find a creative way to slim it down and hack it into a tablet. With a Pi2B on the back, the total depth is 3.5cm, which is a bit ‘tubby’.
Can We Trim It Down A Bit?
I think we can. You could ‘lose’ a lot of z-axis depth if you didn’t need the USB power port. I can see that being the first way people hack the driver board to get it slimmer.
From measurements I’ve made, if you’re willing to butcher away the USB power port, you could potentially position the Pi 7mm closer to the board. You could also save another ~6mm by using an A+ instead of a Pi2. (The highest point on A+ is the GPIO pins – you could potentially shave another 2mm there.) So, in theory, you could save 1.5cm of that depth with some butchery. There may well be other creative solutions using longer ribbon cables and placing the Pi next to the driver board. It’ll be interesting to see what people come up with.
Anything Else?
Yes. It needs something to mount it to. A case, a box, a panel or some sort of stand is going to be necessary for most applications or we’ll see broken bezels before long. There are four threaded mount holes on the LCD back. You could also use an adhesive to glue the bezel into some kind of panel.
Pimoroni have designed a lovely perspex layer case with integral stand that will be available to purchase from them separately. It’s £10 including VAT, and is available in Noir, Flotilla Blue, Tangerine, Coupé Red and Green.
There are some rubber ‘feet’ that fit into the cutouts in the stand. I forgot to put those on before I took this photo…
First Batch Self-Assembly
The first batch of these displays comes as a self-assembly kit. Future batches will be assembled. It’s not a difficult assembly. I managed to work it out with no instructions and I made a little video to help you…
What About In Use?
As long as you have updated/upgraded your Raspbian, it should all ‘just work’ out of the box. The display will be automatically detected and the login screen will appear on it with no additional software tweaks.
Colours are vibrant and the screen is clear. 800 x 480 pixels is enough for most applications and the 7 inch size is great for portable use.
Even watching HD video looks a lot better than I expected. It scales down perfectly with no issues.
As long as you’ve allocated 128 Mb RAM to GPU, dual-screen use is flawless. I plugged in my 23″ Samsung HDMI TV and sent a video through HDMI with omxplayer --display 5 filename.mov This then played flawlessly while I messed around using the camera module on the DSI display. I had it showing live camera video output and also made it wrap live video round a spinning 3d teapot to try and stress the GPU. Neither display skipped a beat. You can see that in the video.
Is It A Power Hog?
No. I measured the display’s power usage with my Emeter while powering the Pi separately. The display used 2.23 Watts. (0.43 A at 5.19 V). A Pi 2 model B uses about 1.5 Watts, so this would give you a system using ~3.75 Watts altogether.
Where Can I Get One?
ThePiHut and Pimoroni, Farnell, CPC.
Overall?
It’s an awesome little cap-touch screen done properly. For ~£50 I think it’ll be very popular for portable applications. It will need some sort of case or support though.
Thanks, great video’s again! Iterested to see how and when the tutorials on the touchscreen part appear!
Great video!
Have you tried it with Windows Core IoT? It will be interesting to see if the display and the touch feature both work out of the box.
Gordon has answered a question about this on the RPF blog page. It looks like, if the Windows 10 Core IoT has up to date firmware it should be able to work just like any other screen plugged in.
Link?
Don’t seem to work right now, no support for DSI. https://social.msdn.microsoft.com/Forums/en-US/48050b1d-5da1-488b-a888-144e159500c7/raspberry-pi-touch-display-and-windows-10?forum=WindowsIoT#48050b1d-5da1-488b-a888-144e159500c7
Hi,
Nice product and nice video!
What is the technology used to have captured video mapped on 3D object (rotating coffee pot)?
Have a good day :-)
Actually it’s done by the GPU/VPU and is part of the raspistill camera software
All the “dirty details” are in https://github.com/raspberrypi/userland/blob/master/host_applications/linux/apps/raspicam/RaspiTex.c
Is it possible to put the display into a low power sleep mode? I have a mobile application which doesn’t require full time display. Being able to save batteries by letting the display go to sleep, but be able to wake it via touch is a critical feature. Thanks!
Not yet, but I gather Gordon is going to see about some software that might facilitate that feature in the coming weeks. i.e. not yet, but maybe :)
With the new Raspbian Jessie supposedly handing over GPIO control to Python without needing to su, I was wondering if I could (a) power the screen by the GPIO; (b) use python to de-power the screen, and (c) use an external button or some other mechanism to trigger python to re-power it on demand. The question is, how will the OS respond to the loss and reappearance of the screen? Maybe I’ll try that this weekend.
how many hats do I wear?!?!?
So, say, I just got A Witty Pi, and it fits nicely….now how does this fit on top of it?!?!?Are we talking like the cut out of a CRT and stuff?!?!?!what case is gonna fit this?!?! just asking…..(dear god, my Pi is gonna look like a CRT with all of the hats i’ve installed….) Just, Effing, saying…..
I think you can answer that question yourself if you look at the photos. The DSI screen’s driver board goes UNDER the Pi. If you put Witty Pi on top, you have a passthrough header you could use for powering the Pi, OR you could power the WittyPi using USB out, or directly.
You can also pick one up from ModMyPi along with their own case/stand http://www.modmypi.com/raspberry-pi/screens-and-displays/raspberry-pi-7-touchscreen-case–plus-stand
I am looking at the driver board, and I have a couple of questions related to it.
1. Can I connect things like a flash drive to that usb port, or is it only power?
2. The little header that you can use to power the pi has four or five pins on it. What are those used for? I am guessing it is not factory use because they give you four jumper cables.
1. Only power
2. 5V, INT, SDA, SCL, GND
Both of these are covered in the first video. :)
what are the INT, SDA, and SCL pins for? I don’t remember hearing about it.
hi,
is it suitable for outdoor use? (is it ok in direct sunlight?)
I’m paraglider, I’d like to use it as instrument in flight…
Tx
I haven’t tried it outside.
I would also love to know this.
Rather than removing the USB from the Pi, why not just turn the board over… Would instantly make in thinner…
I didn’t suggest removing the USB from the Pi. I suggested removing it from the LCD driver board as it’s only a power port and I’m not using it anyway. Yes it’s already been shown (the day after I posted this blog) on the Raspberry Pi blog that you can invert the Pi, but then that makes GPIO access more of a nuisance. That may not be an issue to some people though.
Just got mine and tried it out, works great! I was wondering though if there was a way to make scrolling more touch friendly – I am planning to use it with a full screen browser and having the ability to scroll by dragging would be amazing!
Mine is not working at all! There is no clue that the display is powered gets any power. I connected it via gpio: What am I doing wrong. Or is it broken?
I got mine running, but it’s upside down. I have the display copper colored ribbon cables on bottom. Any thoughts, also how did you get 2 displays running?
Add
lcd_rotate=2to the file config.txt (sudo nano /boot/config.txt) and reboot to rotate the screen 180°I thought I’d shown the command to use two screens at once in this article (I’ll check again).
OK it was kind of buried…
I saw that this morning, sorry for not reading more closely. Just hadn’t had a chance to respond yet.
I tried your 2-display thing, and it’s fine, however, I’ve not rotated the screen yet. Will it also rotate the HDMI?
I guess as much as anything, I’m wondering why this happened to begin with. This Pi has been in use using my 32″ HDMI for about 3 weeks, but upon mounting the 7″ LCD, it’s upside down on boot up. I searched both google and YouTube, but found no other posts about it.
https://www.raspberrypi.org/documentation/hardware/display/troubleshooting.md
It’s very well documented on the Pi forums. Basically it was “upside down” to begin with, so they corrected it.
It shouldn’t affect the HDMI output. It hasn’t affected mine. (There is another parameter for that I think it’s
display_rotate)I just saw something like that, but I’m new to this, so still learning. Pi, linux, etc.
So the copper ribbon cables are supposed to be on the bottom – assuming the display is upright like a monitor? I ask because all the vids I saw on assembling seem to show the ribbons on the top of the display.
Never mind – just found the mech drawing. Shows it should be on bottom.
Thanks gents for tolerating a newbie!
Sorry english is not my mother tongue, so i didn’t understand some things.
I have buy this screen, i have a raspberry pi model B rev 2. I have plug everithing scl, sda, +5V and GND, i have up to date the raspbian, i connect the powersupply to the screen but nothing appear.
I have change the config.txt and add the “ignore_lcd=0”. but it still not wroking.
Can some one advise me to undestrand whats happen?
I don’t know if the drivers for the old model B have been finished yet.
what i see on the website “MODMYPI” is in notes
http://www.modmypi.com/raspberry-pi/screens-and-displays/raspberry-pi-7-touchscreen-display-official
That it should work, only we can’t mount it in the mounting holes
I’ve not tried it myself, but https://www.raspberrypi.org/documentation/hardware/display/Readme.md has instructions for connecting the display to the “non-plus” model Raspberry Pis. If you can’t get it working, best place to ask for help would be on the official forums https://www.raspberrypi.org/forums/
AndrewS, alex,
Thank’s a lot for your help.
I have take some time to find in the official forums the good topic. But i have find the information :
https://www.raspberrypi.org/forums/viewtopic.php?f=108&t=126342
This topic give two answer and give some precious help.
So The result is working with the raspberry B v2.
Hello,
I have a 7” screen from my nexus 7 2012 and I was wondering whether I could adapt this screen with the card provided here.
I would like to unmount the screen and then plug it to the board here. Do you know whether this is feasible or not?
Thanks for your answers.
Yes I do know. It’s not. Sorry :(
I like the screen, but eventually don’t want to use is for showing the bootscreen and the desktop, but have a “silent” boot directly into a UI of an app. Would this be possible with eg: appjs or node-webkit?
I’ve not used either of those apps, but there’s plenty of info in Google about configuring a silent boot https://www.google.co.uk/search?q=raspberry+pi+silent+boot
Is it supported with Windows 10 IoT?
It is supported in Win IoT 10 insider preview…
I just got mine recently and I am trying to boot up a simple “buildroot” os and the display doesn’t seem to show anything but the color box. Do I need special software to drive this? Where would I find that source?
I find it extremly useful if your HDMI port does not display