Today I launched the RasPiO Breadboard Pi Bridge (BBPi for short).
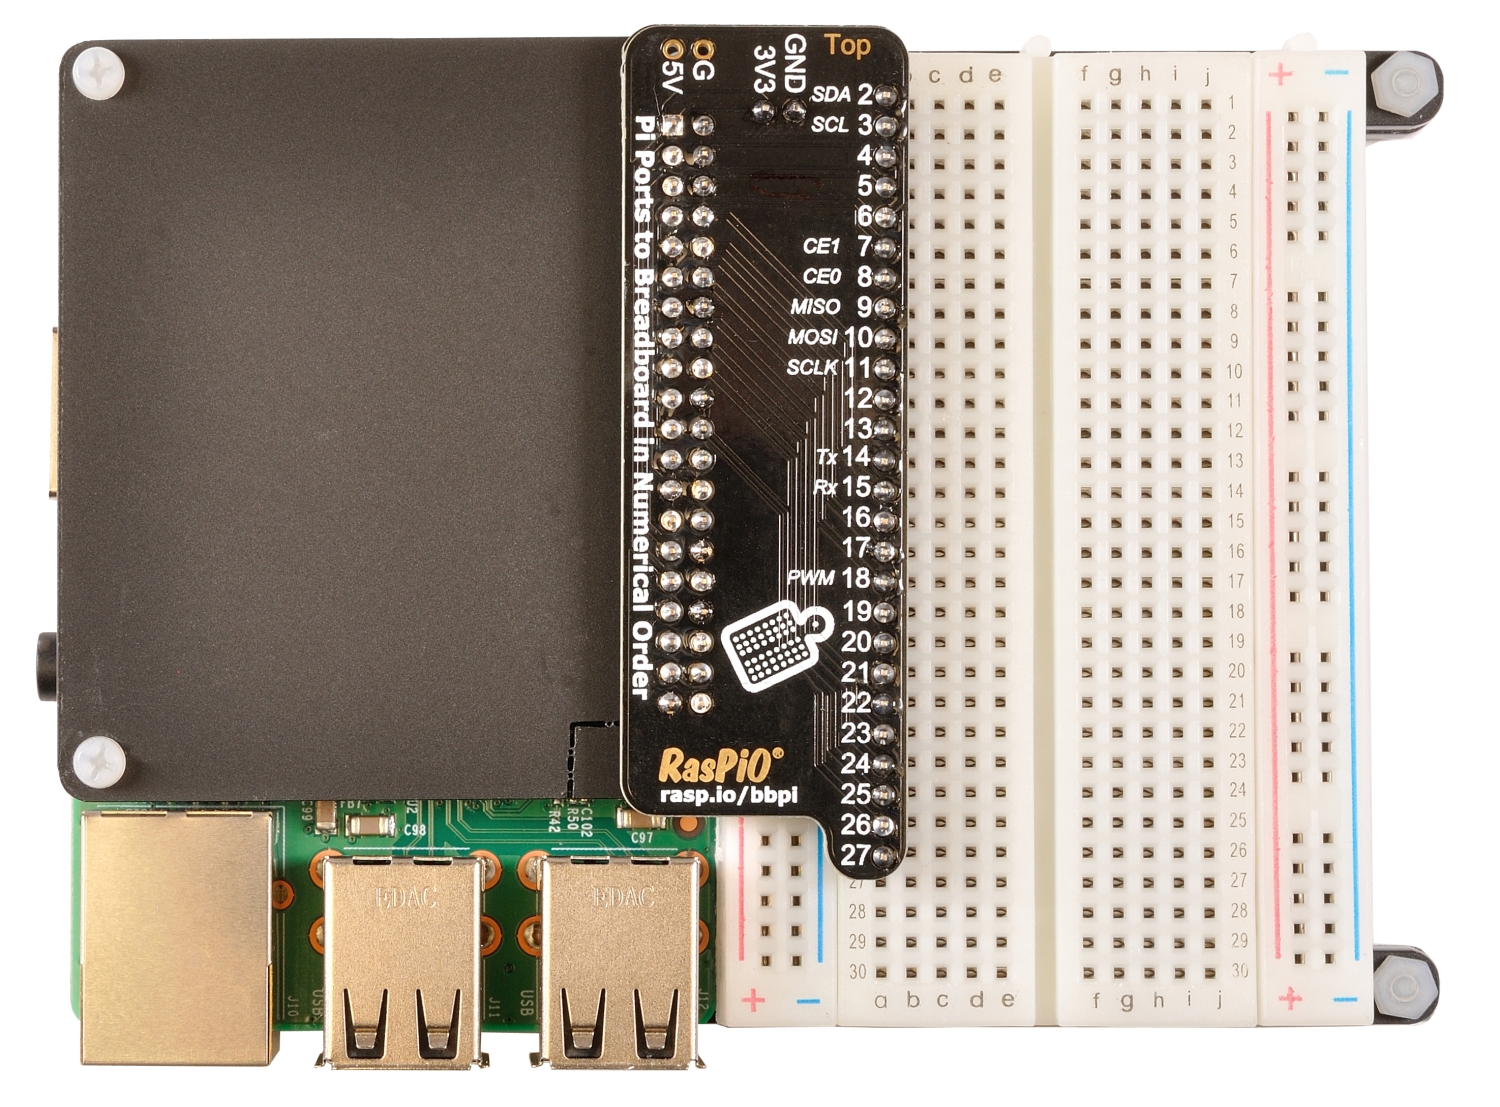
It’s a PCB that breaks out all the GPIO ports of a Raspberry Pi in order on a half-size breadboard, complete with a Perspex platform to hold it all nicely together. It’s a clean, robust and elegant solution for simple electronics tinkering with Pi. This is what it looks like…
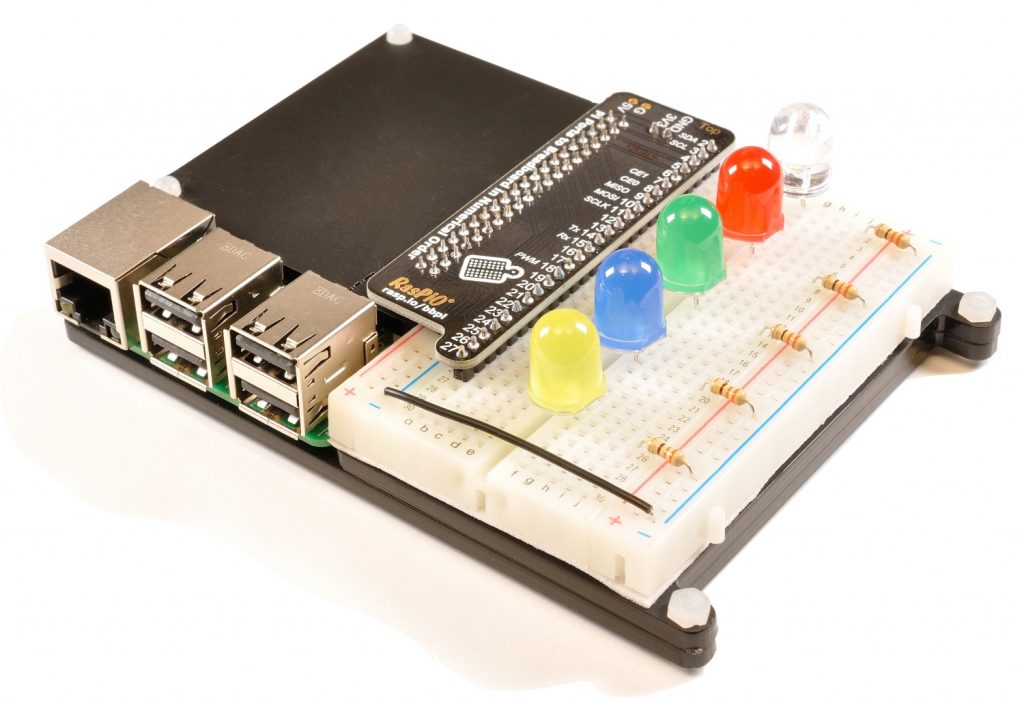
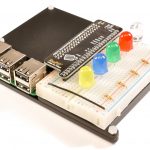
RasPiO Breadboard Pi Bridge (BBPi)
If you want to snag one of the last 26 (at the time of publication) early-bird offers, use the code EARLY at the checkout, but be quick.
Development Process
I thought it would be fun to share the development backstory here. It takes time to develop even a simple product like this. In theory it could be done a lot faster, but sometimes life gets in the way a bit.
Idea – May/June 2018
I had the original idea sometime around May/June 2018. The idea was to be able to integrate a breadboard and Pi into one unit. Originally I wanted to put the breadboard on top of the Pi and have some kind of platform to hold it in place. Then you could do your breadboarding right on top of the Pi. It sounded good to me (and it looked good in my head). I did a quick sketch in my ideas book and picked it up again after the summer. Yes it’s a crap sketch, but it was enough for me to remember the concept…

It was at this point that the readers realised the author’s handwriting and drawing left a lot to be desired
PCB iteration 1 – September 2018
So in late September 2018 I got on with designing a PCB to make that happen. When the PCBs arrived I built one out – complete with supporting acrylic structure – and quickly realised…
- the breadboard was a little bit too big to be a nice fit on the Pi
- the stacking header is going to cause users too much hassle
- it just didn’t look or feel like it was quite nice enough
So, after a bit of thought, I flipped over the PCB (to test physical fit only), putting the breadboard next to the Pi, on its own platform to get the height just right. This worked much better both aesthetically and physically.

New layout for iteration 2, shown without Pi cover
PCB iteration 2 – October 2018
I redesigned the PCB the other way round in October 2018. The PCBs arrived towards the end of October and I decided that glossy black Perspex very quickly gets yucky with fingerprints.
Having handled a lot of frosted Perspex while making the RasPiO Night Lights I’d noticed that it doesn’t suffer the same issue. So I bought some frosted black Perspex to try and it works a treat.
View from above, showing the frosted black Perspex Pi lid
I also sourced the nuts, bolts and spacers at this time, finished developing the base and structure and worked out the BOM and costings.
Sit on it
Then I sat on it for a while which can be both a good and a bad thing to do. If you’re in too much of a hurry, you can make mistakes and miss easy opportunities to improve the product because you hadn’t thought of them until after you ordered the PCBs. Sometimes it’s good to ruminate on a product for a while, but not for too long or someone else might have the same or similar idea and beat you to the punch. It’s usually better to be first. But as mentioned earlier, sometimes life gets in the way and you have little choice. So best to wait until you can do it properly.
Finalise Costings and BOM – March 2019
Just last week I decided “I need to get on with this” and found the impetus to get going. I got costings for the PCB and decided to include the LEDs and resistors in the product kit, thus finalising the bill of materials (BOM).
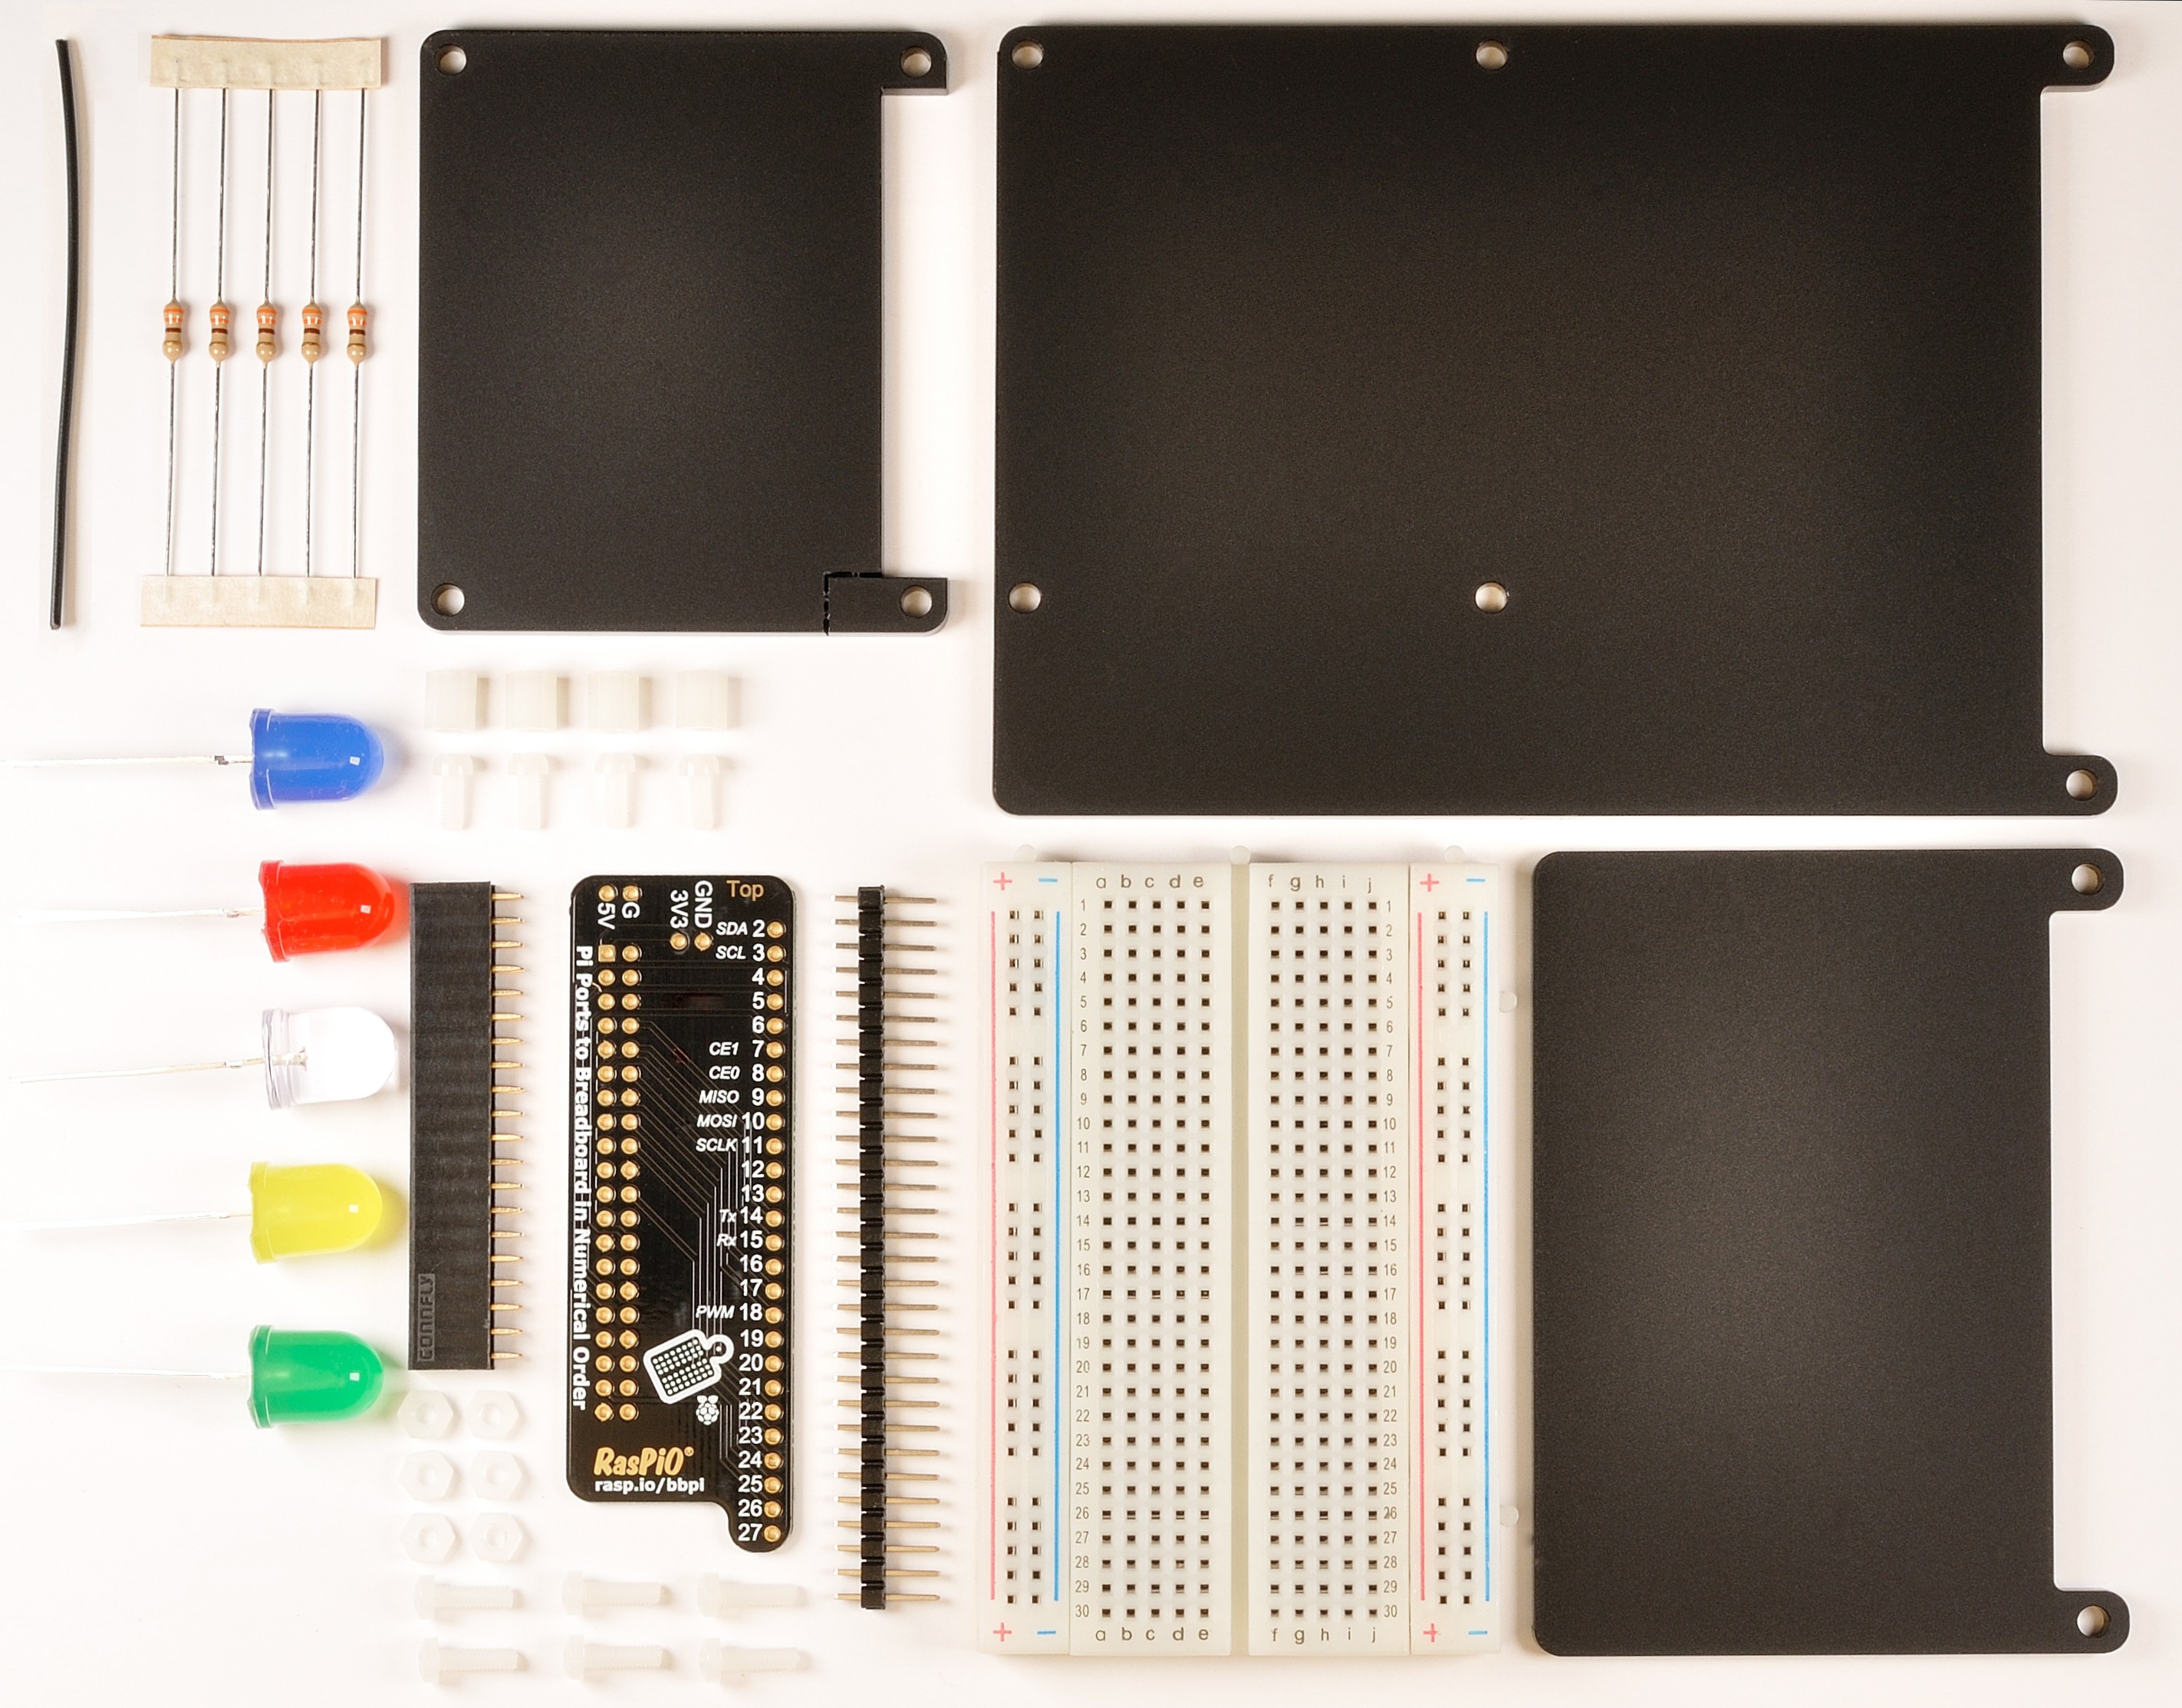
Kit contents – final BOM
Once you know how much the product will cost you to make, you can set the retail price. Most people in the field use a factor of 3 or 4 times cost for the retail price. By the time you’ve included cost of production, manufacturer’s margin, wholesaler’s margin, retailer’s margin & VAT this is about the right level.
Set a Launch Date and Get Marketing
Also last week I mentally committed to 26th March as launch date. I also…
- took and post-processed most of the product and kit photographs
- wrote a covering letter to alpha testers/media/bloggers
- built some sample units and sent them out
On Sunday evening I started writing the product sales pitch. This is incredibly late for me. When you do a KickStarter, you need approval, so you have to prepare your pitch a couple of weeks in advance. Because I’m self-hosting this campaign, I could leave it a bit later.
By Monday evening the campaign page was done and it was time to write an email to go out to previous backers. Then this morning it was time to set the ball rolling with a tweet, followed up by emailing previous backers.
At the time of publication, there’s still 26 EARLY offers left. Head over to the campaign page and pick up your RasPiO Breadboard Pi Bridge now. Thank you for your support.
Already ordered one. Seems like a big-brother to the RasPiO Pro Hat :-)
Why does the logo on the PCB look like a fly-swatter?
In many ways I suppose it is a big brother to the Pro Hat. The logo is meant to be a pun. It’s a breadboard for cutting bread, but with holes added to make it look more like an electronics breadboard. No flies were harmed in the design and making of this product. :)
Will I see you at PiWars this weekend?
Nah I won’t be at PiWars – I have other plans for this weekend. Have fun!
Hi Alex
Just wondering why you included a cover for the Pi, particularly since it’s opaque and obscures the LEDs. I shall be leaving mine off, anyway, since both of my “spare” Pi’s are fitted with heatsinks.
Partly for aesthetic reasons and partly for protection (e.g. in school usage). But it’s a choice whether to use it or not.