Dec 212018
 
Making a fairly simple bike dashcam with Raspberry Pi – “Live project blog” pt5 Road Testing

The installation ‘proper’ was finished in the previous post (part 4), so I grabbed a small ‘weather window’ and went out for a 16 mile ride on one of my regular routes to test out the system. It was very windy and rather cloudy but I was very keen to see how the bike dashcam would perform in a real-life situation. What can I say? It worked perfectly as an electronic rear-view ‘mirror’ all the way round. With the Perspex ‘wedge shim’ it was pointed at exactly the right angle. I could see whether there […more…]
Dec 192018
 
Making a fairly simple bike dashcam with Raspberry Pi – “Live project blog” pt4

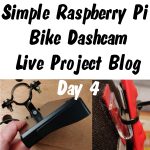
In part 3 the hardware and software were all working and attached temporarily to the bike. So now it was time to have a quick test ride up and down the street. Having shot some trial footage, I realised immediately that I needed to change the angle to point the camera down more. Once that was done by shoving a piece of foam in between the saddlebag and Pi (at the top) it became usable. The 4.2″ screen is a decent size and is easy to see while riding. You can clearly see what’s behind […more…]

Dec 172018
 
Making a fairly simple bike dashcam with Raspberry Pi - "Live project blog" pt2

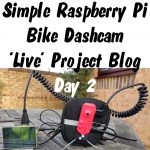
In part 1, I covered the initial concept’s ‘evening 1 musings’. Now it’s time to get going on the project and see if we can make it work… Getting Access Point Running on 3A+ I went through this procedure… Set up wireless access point on Raspbian Stretch stopping at the part “Add routing and masquerade” as it seemed unnecessary (there is no ethernet port on a Pi3A+). Then I could log into the 3A+ from my mac. I connected up the screen and tested it with the camera. The AP seemed OK with the screen […more…]

Dec 142018
 
Making a fairly simple bike dashcam with Raspberry Pi - "Live project blog" pt1

Anyone who follows me on twitter can’t fail to have noticed some cycling related comments recently. Yes, cycling is the current interest. I’ve ridden about 1100 miles in the last 6 months and have learned enough to bore you to death with talk of heart zones and various items of clothing you can buy to make winter rides more bearable. But I won’t! Although I will say that I’m reliably informed by close friends that simultaneously wearing both my balaclava in ‘full ninja’ mode AND my cycle helmet cover makes me look like a ‘tit’. […more…]

Mar 172017
 
Make an LED Arrow Sign with RasPiO InsPiRing

One of the interesting usage possibilities for the RasPiO InsPiRing system is illuminated signage. What could be better than flashy, blinky, multi-coloured signage? Well, not much really? So I decided to make an arrow out of two straight 8s and a triangle. I used white depron foam as a base, ordinary headers and jumper wires to connect all the shapes to each other and to the controller. Then a needle and thread and some hot glue to fasten the shapes to the depron. I then darkened the foam with a marker pen. This is what […more…]

May 202016
 
Raspberry Pi Zero 1.3 Power Usage with camera

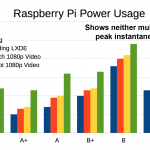
It’s only a few days since the Pi Zero 1.3 came out, but people are already asking for me to “fill in the gap” on my power chart. Which gap? The “Pi Zero shooting 1080p video” gap. With no camera port, the previous Pi Zero couldn’t do this, so there was no measurement to report. I’ve made some measurements this morning and here are the results… No Real Surprises I tried both old and new cameras and there wasn’t any significant difference (that I could measure) between them. The results are comparable to that of […more…]

May 162016
 
Raspberry Pi Zero 1.3 with camera port

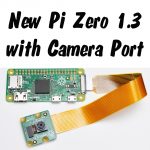
A new Raspberry Pi Zero with camera port is released today. It’s revision 1.3. Some power circuitry was moved and some unpopulated pads at U13 were removed to make space for the new mini camera port which is right on the end of the Pi Zero 1.3. Other than that, the new Zero looks much the same as the previous version. I did a little walkaround video, showing use of the camera port and camera output. Adding a camera port to the Zero has opened up a whole new range of project possibilities. It’s added […more…]

Apr 282016
 
New and old Raspberry Pi Camera comparison shots (1.3, 2.1 & NOIR)

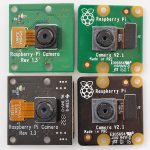
I thought it would be fun to run the same tests on the new Pi cameras that I did on the original one back in May 2013. Unfortunately my first Pi camera 2.1 was faulty so I had to wait an extra day before I could do it. (It’s the first time out of about 50 Raspberry Pi products that I have ever had a faulty one.) But now here are the results. I’ve compared both 2.1 cameras with both 1.3 Raspberry Pi cameras. Methodology I shot the scene out of an open window, trying […more…]

Apr 252016
 
New 8 Megapixel Raspberry Pi camera 2.1 launches

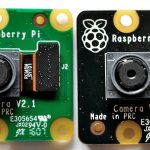
The new 8 Megapixel Raspberry Pi camera is released today. It’s fully backward compatible with all camera-enabled Raspberry Pis produced to-date. It uses a SONY IMX219 sensor capable of 3280 x 2464 pixel stills. It’s mechanically almost identical to the previous camera model (V1.3) except for rounded corners on the PCB – and there’s no red LED on the front. There’s also a NOIR version being released at the same time. They both support 1080p30, 720p60 and 640x480p90 video. Here’s a video overview… Specifications Lens: Fixed focus Megapixels: 8 megapixel native resolution sensor Camera Resolution: […more…]

Sep 292014
 
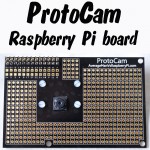
protocam

In my previous blog post I started a series on how to program a KickStarter tracker. That will continue soon. In the meantime, one of the KickStarter campaigns I’ve been tracking is for a nice little board called the ProtoCam. It’s a simple, but original, idea by Richard Saville, who blogs under the name of ‘AverageManVsRaspberryPi’. (His emphasis is on quality articles, often with complete ‘how-tos’ for specific things he’s learned to do.) So he came up with this original idea for a prototyping board with space for a Pi camera on. You can put […more…]