In part 3 the hardware and software were all working and attached temporarily to the bike. So now it was time to have a quick test ride up and down the street.
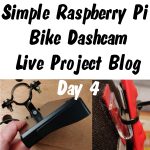
Having shot some trial footage, I realised immediately that I needed to change the angle to point the camera down more. Once that was done by shoving a piece of foam in between the saddlebag and Pi (at the top) it became usable.
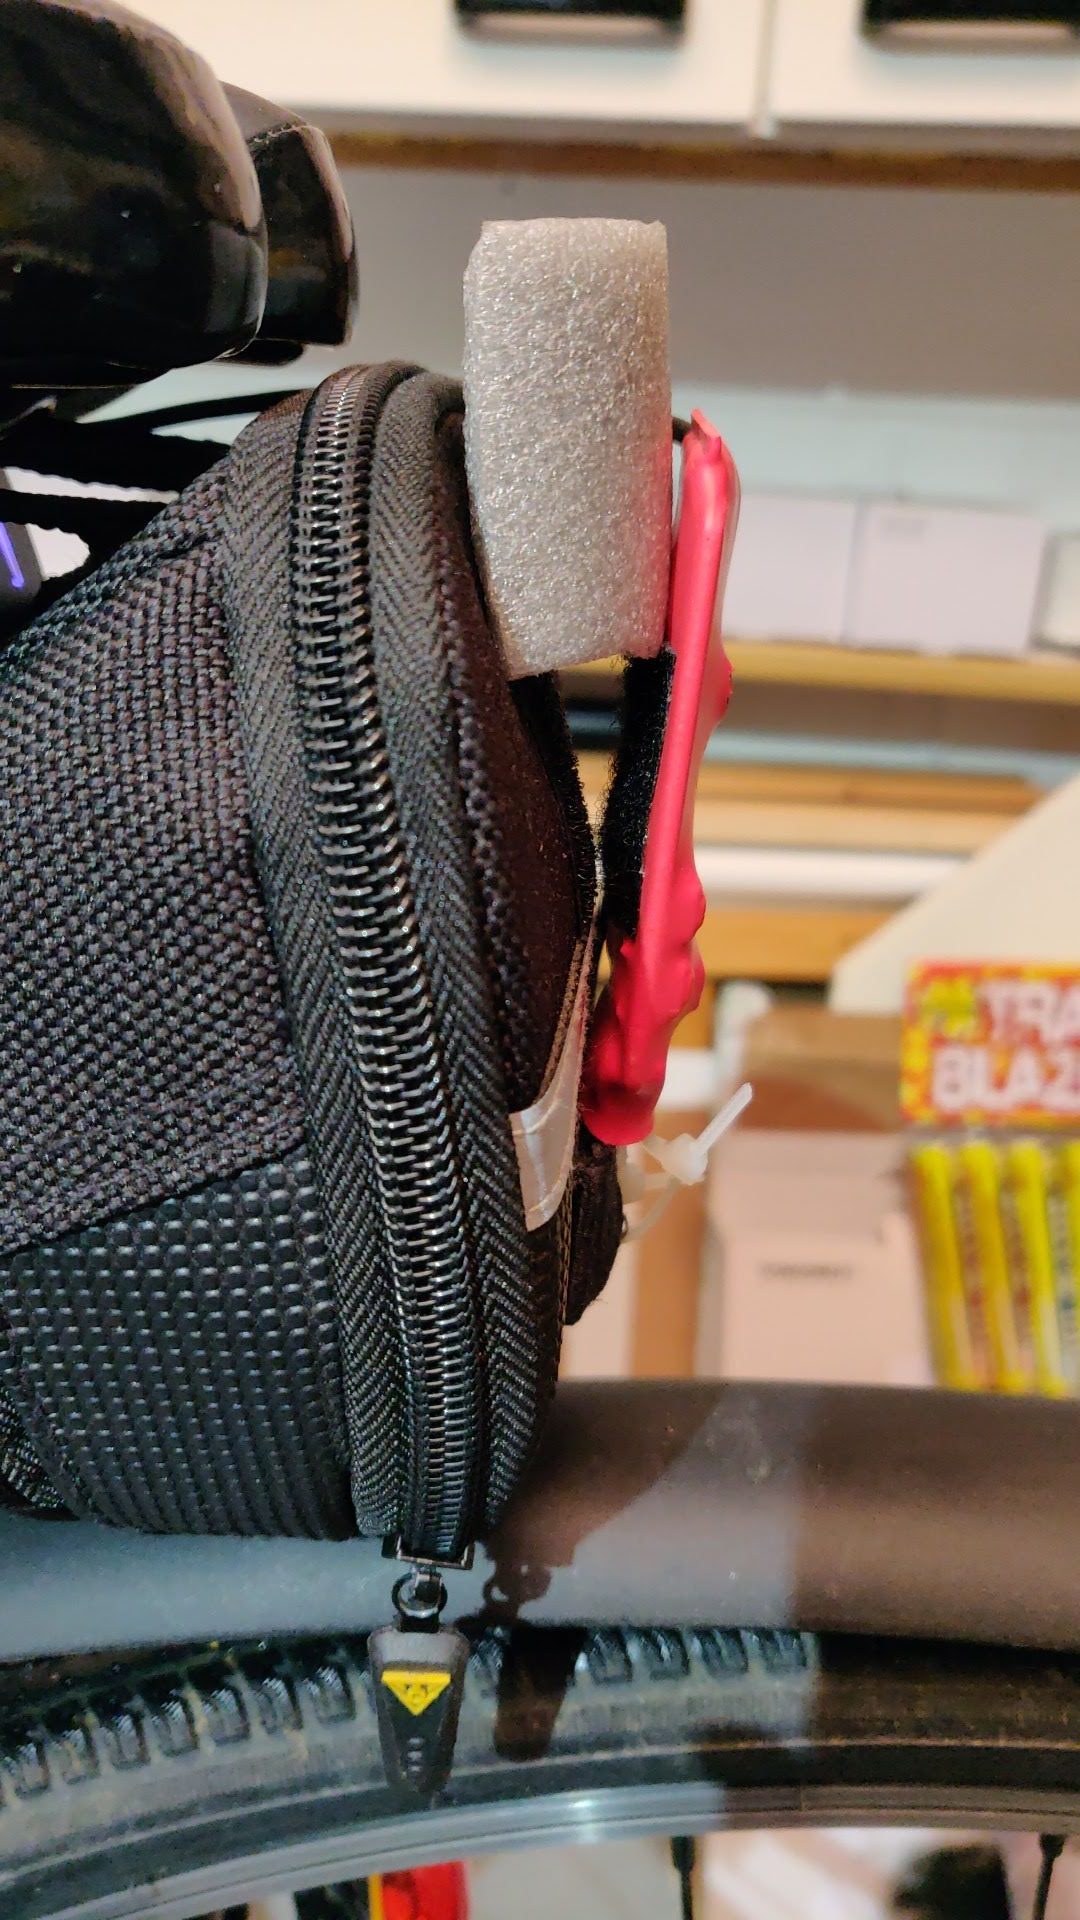
Foam ‘angle adjuster’
The 4.2″ screen is a decent size and is easy to see while riding. You can clearly see what’s behind you, but the resolution on the video (shot half an hour before sunset on a cloudy December day) was not good enough to resolve a car number plate. So useless as evidence, but a huge success as a rear-view mirror. I’ll need to try in better light conditions before reworking it with a better camera. I suspect that either these unofficial cameras aren’t really very good, or they’re a bit delicate and don’t like being hacked around, which maybe messes up their focus? I don’t know which it is.
I will also need to find something a bit better than a ‘lump of foam’ to hold the Pi Zero W and camera at the right angle.
View from the Camera
Here’s the initial footage from ‘maiden’ ride of new dashcam (after adding foam). It’s not particularly good video, but it gives you an idea of what the camera recorded in poor light.
At this point, I decided that the bike dashcam project is worth pursuing and installing ‘properly’.
- The software works
- The hardware works perfectly as rear-view mirror
- As yet untested out on the road in ‘normal’ conditions, so not sure if the Zerocam camera is quite up to it for dashcam ‘evidence’
So What’s Left to do?
- Put the software on Github as a backup and so it can be shared
- Make a proper handlebar mount for the screen
- Make a proper ‘shim’ to hold the camera at the correct angle
- Install the wires and cables properly and as ‘invisibly as possible’, but still be able to access and remove the saddlebag
- Go for a proper, real-world road test
I ordered some reusable cable ties to help with the wiring.
Files are now on Github
I’ve put the Python and bash scripts up on Github here
Zero W is a Good Choice
It turns out that a Zero W is a good choice for this application as you are able to process and download files from it afterwards.
You can’t view .h264 files easily in most software, so it helps to wrap it in an mp4 container. This can be done easily and fairly quickly on the Pi, using gpac’s MP4Box. I wrote a blog about this a while back, but the essence of it is below…
Another way to convert Raspberry Pi Camera .h264 output to .mp4
gpac Installation
sudo apt-get update

sudo apt-get install gpac

y
Usage:
MP4Box -add filename.h264 filename.mp4
Then download the .mp4 via sftp (I use Filezilla on my mac) and you’ll be able to view it.
You can also view the raw .h264 files directly on the Pi using omxplayer if you have a screen attached
omxplayer filename.h264
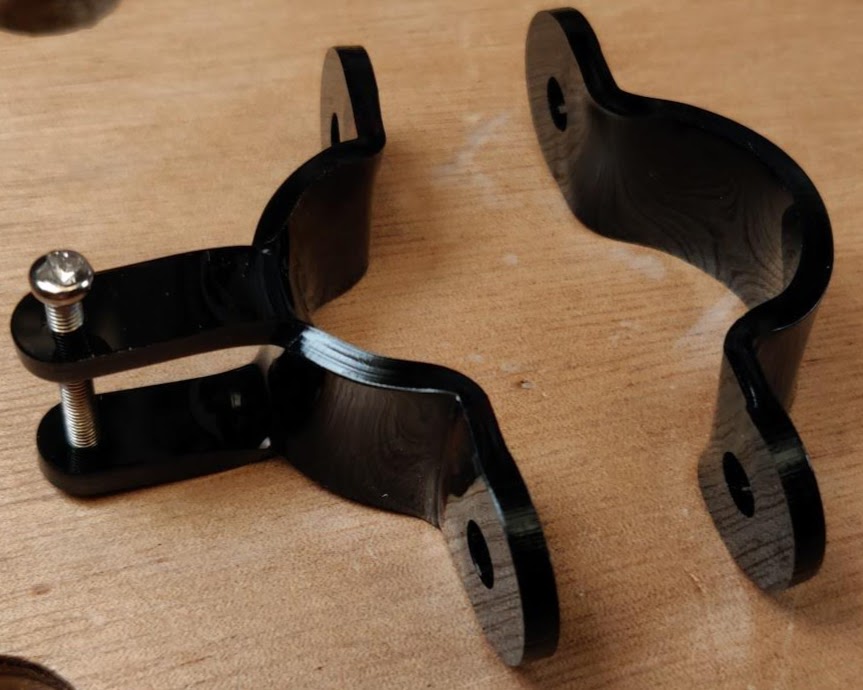
Design and Make a Shim and Screen Mount
The shim was straightforward. I cut a rectangle of 2mm colourless acrylic and bent it using heat from my reflow torch. The bend was slightly diagonal and was squashed more on one side than the other to introduce a slight twist. This was because I wanted to the camera to be angled slightly down and slightly to the right. A bit of velcro and a cable tie finished the job.
Acrylic wedge-shaped shim camera mount
Didn’t get much else done today due to a hectic day on other things. But I did have a great session in the workshop in the evening making a proper bracket to mount the screen on the bike. It took 2 iterations, first time I learnt a lot and second time got it completely right. It’s a complex bend and you have to be careful not to stress the material too much. Perspex (acrylic) probably isn’t the best material for this (it’s a bit brittle), but it’s what I have. It was also a very entertaining 3d puzzle for me to design and work out how to heat bend the flat material into the required 3d shape while still looking nice.
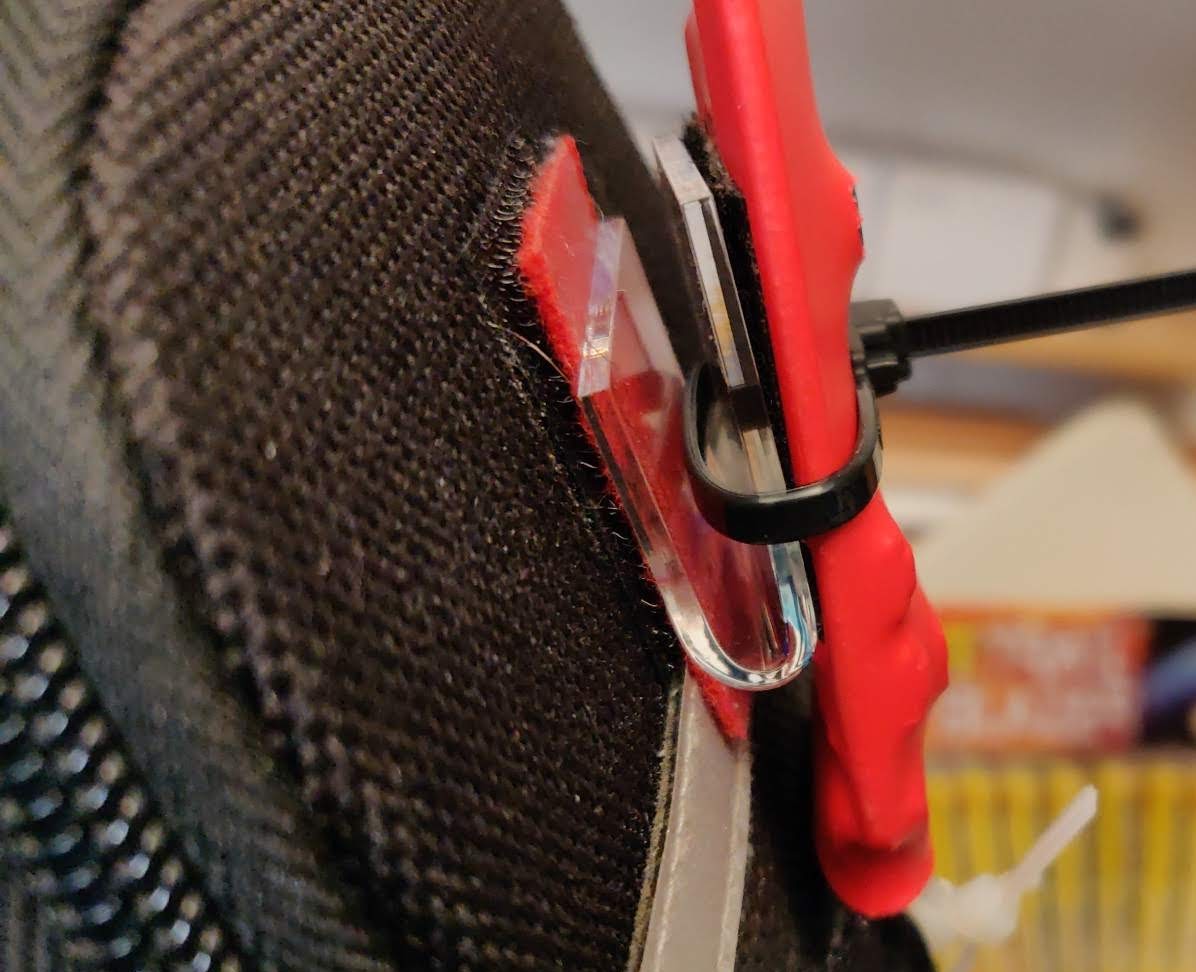
I made it in two parts…
Screen mount parts before bending
The diameter of the handlebar is 25mm and the M3 threaded holes we’re making to attach the screen need to be 19mm apart. I found a piece of dowel with 25mm diameter and used this to help form the right shape of curved bend in the simpler piece…
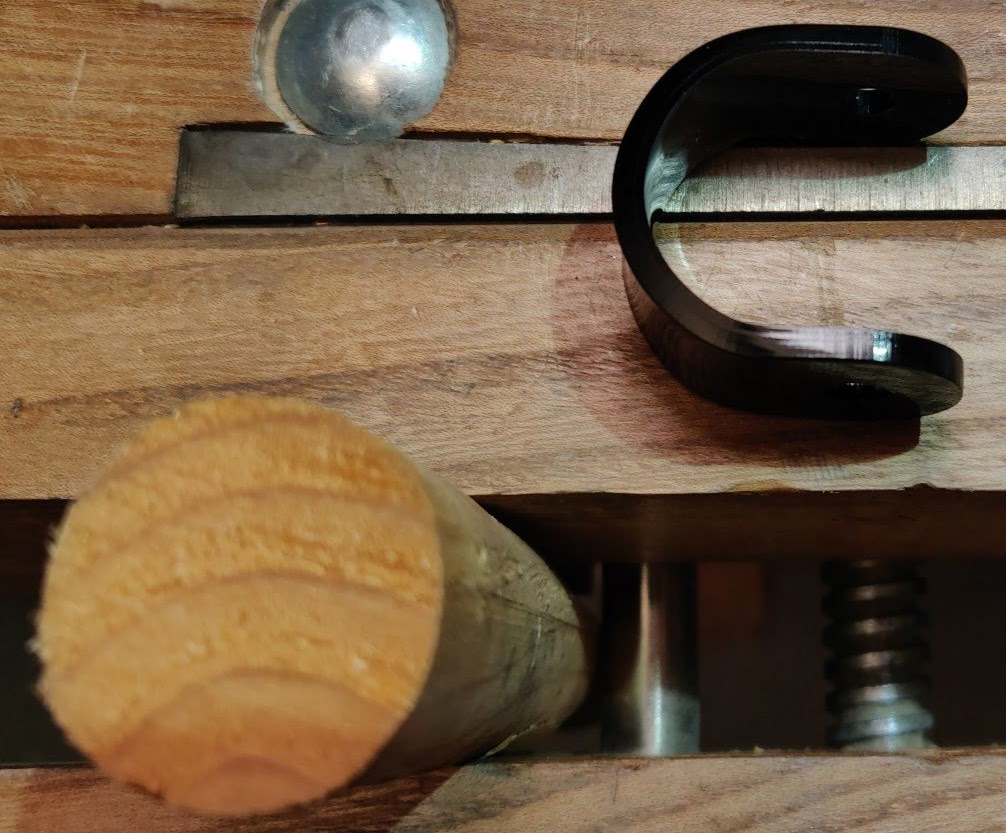
First make a u-bend and test for fit
Next I tapped M3 threads into the two holes for the screen mounting side. See how to do that here. Once that was done, I set the vice jaws exactly 19mm apart and heated the two places that needed to be bent. Heat was applied liberally on both sides. Once hot enough, the 19mm wide Perspex was kept flat and pressed into the vice bending both sides simultaneously and symmetrically. Once approximately right it was allowed to cool and then each side was individually heated and adjusted. After a couple of tweaks it fitted the screen perfectly. An M3 bolt was then threaded through both holes to keep them the correct distance apart while forming the rest of this piece.
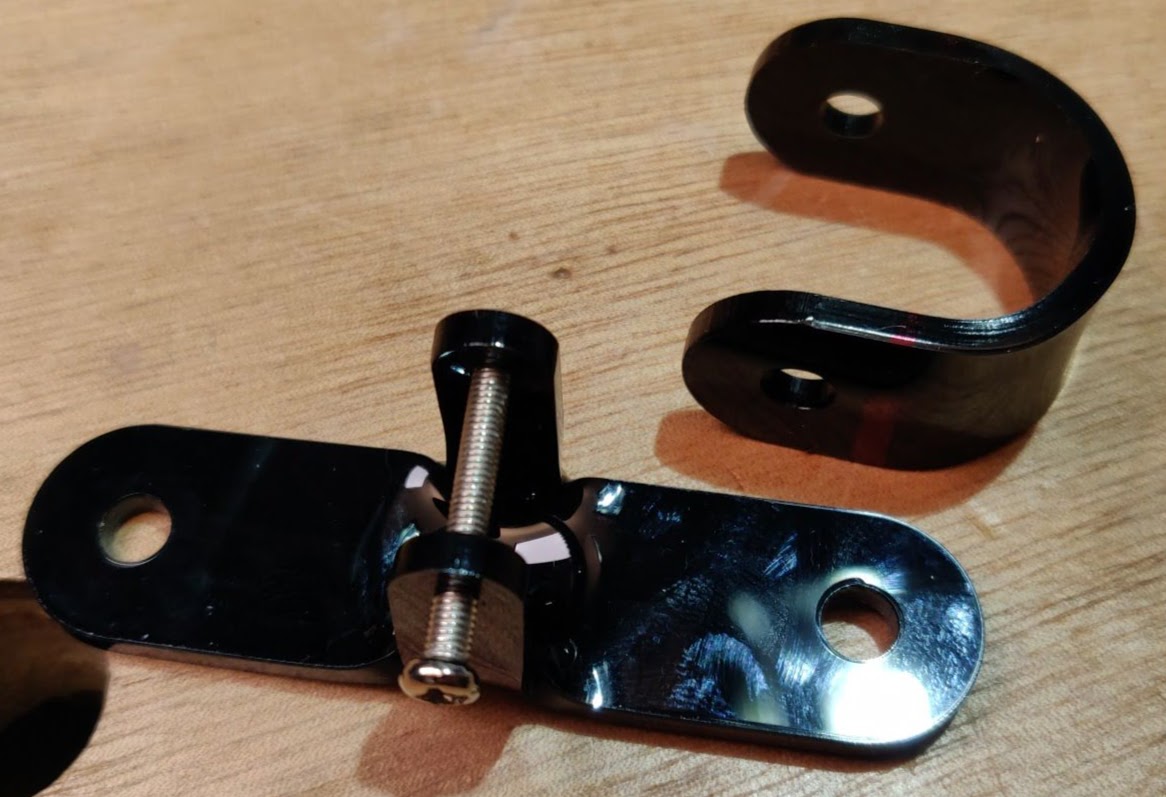
Threaded uprights held in place
Then the second, more complex piece was formed around the dowel with lots of heat and patience…
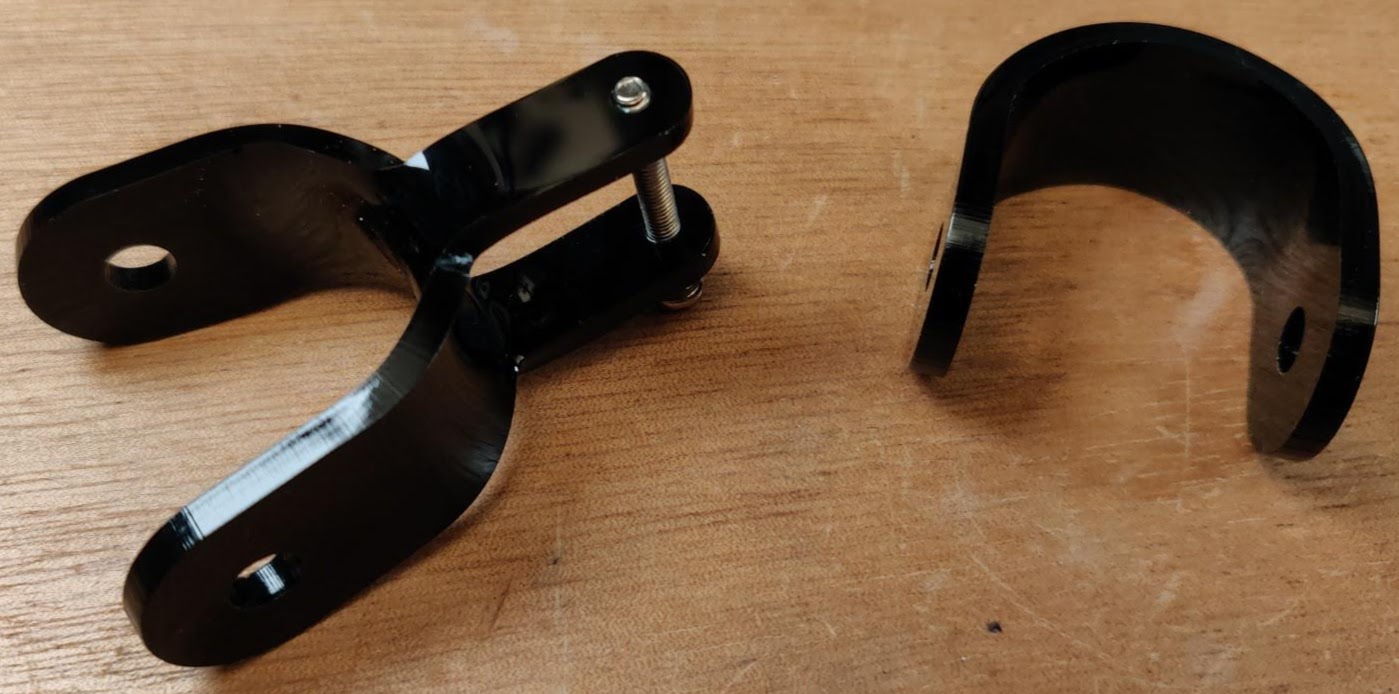
U-shaped bend made in second piece
After that, I tried doing the 90 degree bends on the simpler piece first. The thinking here was that if I messed it up it would be easier to remake that piece. I used a pair of flat pliers and just grabbed and twisted once the Perspex was hot. It was quite straightforward.
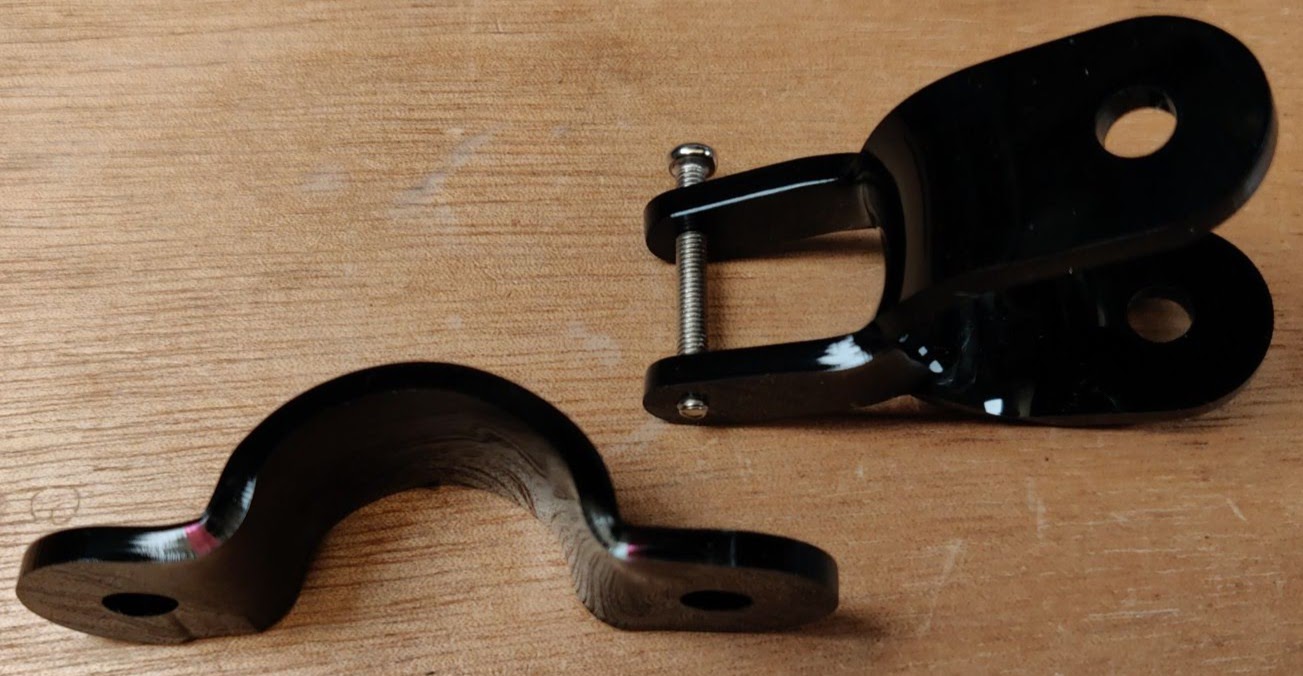
90 degree bends made
Having safely learnt the technique on the other piece, I did the same for the more complex side…
90 degree bends on the more complex side
Then there was a little heating and tweaking to make the holes line up a bit better. After that the mount was bolted to the screen with a pair of nylon bolts…
Bracket bolted to screen mounting points
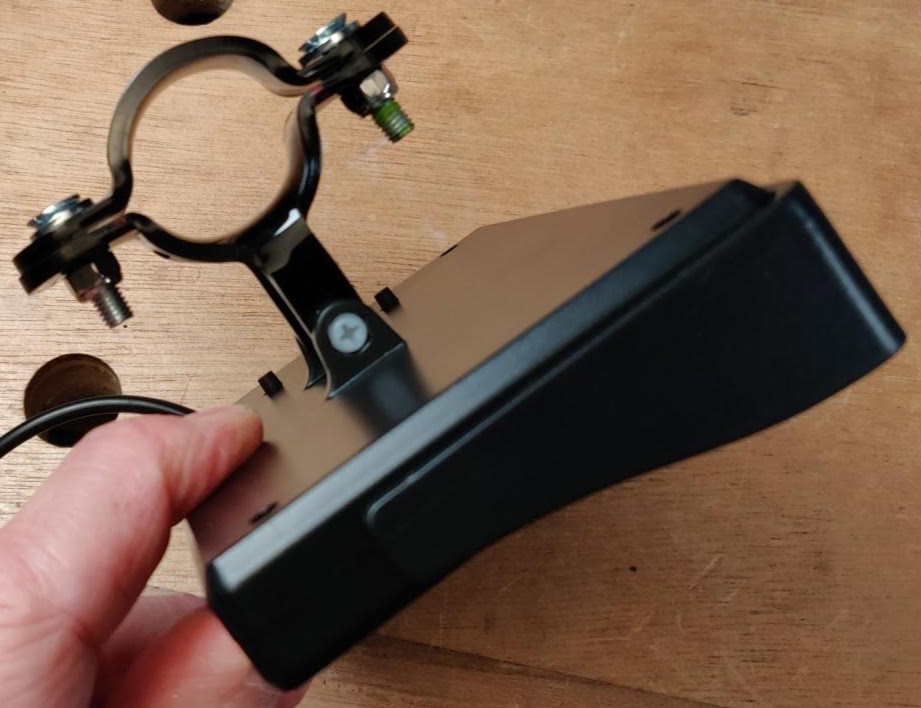
And then the whole thing was mounted on the handlebars (I used locking nuts on the bracket)…

Screen mounted on handlebars
I’m really very pleased with the final outcome. That’s one of the reasons for so many photos, but the other reason is that if I ever need to make another, I’ll have all the steps in the process documented (which is one reason that I blog).
Just a teeny piece of rubber band between the bracket and handlebar was needed to give it something to grip on to prevent it twisting around.
Install Wires and Cables Properly and ‘Invisibly’
After that I used reusable cable ties and some black insulating tape to route the power and video cables as securely and ‘invisibly’ as possible round the bike frame. Where leads were too long, they were coiled around unobstrusive areas of the frame. The idea here is that the wiring should not detract from the aesthetic of the bike. Also if it’s not easily visible, nobody’s attention will be drawn to it either.
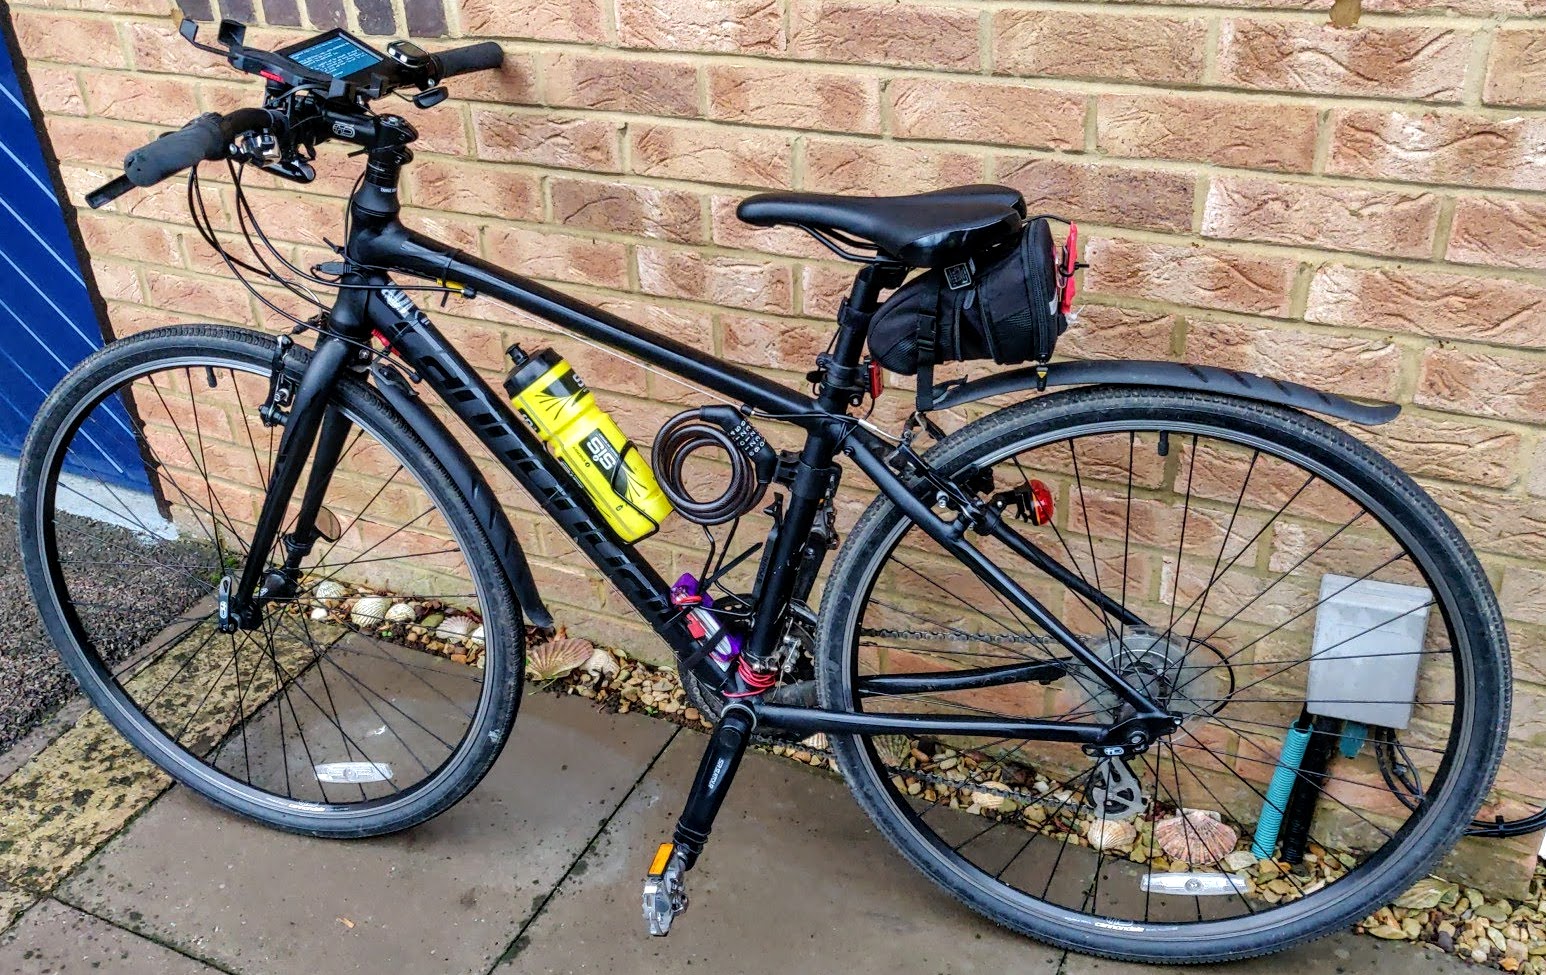
System installed on the bike as unobtrusively as possible
All that remains now is the road test, which is in the next part.
The images seem to be better when the bike is not moving. To me the problem looks to be a combination of vibration & video compression. If the features move around from frame to frame the compression algorithm will have difficulty. It would be worth taking a series of still images with the camera while riding along to see what the resolution is then.
Thanks John. We’ll see what it’s like when I do a proper real-life test when there’s a bit more light about. I think it’s possible that I was giving it an unfair test in low light. Oooh look! The sun’s come out. I best get out there then :)
This is a great project Alex, makes me wonder about mounting something similar on my motorbike, and replacing my rear-view mirrors with displays. Currently, the mirrors give an excellent view of my elbows! Or even create miniature versions of the two-way mirror/display jobs, and possibly display gps directions.
I’m sure this has a lot of possibilities.
Cheers
Rich
Rich,
In the UK at least that would probably be illegal under the rules that prevent you having a ‘TV’ visible to the driver while the vehicle is in motion. I beleive that there may be an exception for dispals / cameras that are only on when you are reversing but you probably don’t do much of that on your motorbike !
Does a display count as a TV? If so, I would imagine that all sat navs fall under that heading – which means several thousand people are breaking the law daily.
And ALL dashcams that have a screen. I think a careful look at the law would be a good idea.
Also, if you go to Amazon and search on ‘motorbike dashcam’ you’ll find a lot of them with 2 cameras and a display you can use to switch between the two. I almost bought one but the reviews of the affordable ones put me off and I didn’t want to stump up £200 for a ‘good’ one.
I find it hard to believe that using them with the display on would be illegal. Many people driving cars these days have both a satnav AND a dashcam running with screens.
I’m sure a TV is an entirely separate category.
As far as bike use is concerned, I’ve found it incredibly helpful, but I’m not going to jump the gun on the next part of the blog series ;p
(Edit to add: there’s an interesting discussion here https://dashcamtalk.com/forum/threads/uk-law-for-in-car-cam.5280/ but it looks rather to me as if the law is lagging behind tech once again).
Absolutely, a good look at the applicable law has to be a good idea.
As for the off-the-shelf dash cams for motorbikes, there’s some appeal to that, but there’s more appeal in building the thing oneself – and I’m fairly taken with the idea of mounting displays in the mirrors. Plus a pi has much more functionality to exploit – and is way cheaper.
Anyway, I’m blaming you for making these projects so interesting :-D
These are a great read Alex, thanks for sharing and for the thorough documenting.
You’re welcome. I must admit keeping up with the project on a day to day basis has been a challenge this time. I find blogs like this interesting, detailing all the decisions, thinking and processes. I know some people prefer to skip to the ‘polished final video’, but sometimes the process is as interesting or more than the result. Although I have to say I’m very pleased with the result of this project. :)
The relevant law in the uk is section 109 of The Construction & Use Regulations 1986 though the copy you will find on line had been amended to change the reference to Cathode Ray Tubes to a more generalised description of displays. This covers most motor vehicles though there are a few exceptions for unusual vehicles.
I am not a legal expert but it seems .s.109 (b) or possibly (d) may allow the use of Sat Navs.
In terms of DashCams the opinion seems to be that the screen should be off when the vehicle is in use, ie the ignition is switched on.
.s.109 (c) allows use ‘to assist the driver to see the road adjacent to the vehicle’ – I am not sure if this would include use as a rear view mirror while moving at speed or only to see obstructions when reversing.
The situation is complicated as this is probably the UK implimentation of some EU regulations which (until Brexit) take prescedence.
Not really relevant to motor cycles but Dash Cams and Satellites have to be mounted outside the area swept by the windscreen wipers so the dash cam will be of little use in rain or snow. Strange really but the EU / UK Train design regulations insist that the forward facing CCTV cameras are mounted within the area swept by the windscreen wipers though alternative methods of keeping the lens washed and wiped are allowed.
It appears that motor cycles do not need to have mirrors but if fitted have to comply with some EU regulations.
Great post John – thanks. I’ve been looking at dashcam regs and suggested installation instructions this evening.
In fact I realised my car dashcam installation was not compliant, so I’ve already popped to the local Halfords and bought a disc which I can stick on the ‘black dotted’ area of the windscreen and use to mount my dashcam behind the rearview mirror and thus install it in such a way that it doesn’t encroach more than 40mm into the windscreen wiper green zone…
AND the screen, if on, will be behind the mirror, so not visible to the driver. Sounds like a win to me :)
My bike doesn’t have any windscreen wipers, so I reckon I’m OK. ;p
Wouldn’t it be neater and give greater control to start stop and alter things by using picamera, the Python module they made.
it really is quite capable https://picamera.readthedocs.io/en/release-1.13/
Perhaps it would? I don’t know. But I’ve gone to great lengths over these several blog posts to explain all my design choices and changes of direction. This software is built on Raspicamcorder2 which I wrote 5 years ago. It required little work to adapt it and it works perfectly and I spent about maybe 3 or 4 hours on the software. I’m just back from a 28 mile test ride during which it worked perfectly. At this point in time I don’t really care much about ‘neater’.
If I was starting all over again, I’d probably go with Python 3 and picamera. But then it would have probably taken me too long to get a result and that would have put me off doing the project altogether.
Thanks for that reference John, it’s as interesting as it is frustrating! While you can appreciate the intent, it seems to be far too broadly proscriptive and, as Alex says, the law appears to be lagging behind the tech.
However, it does seem that an argument could be made that 109(c) would apply in a case where an unobscured (by elbows) rear view is required? This is a common and frustrating problem on many sports bikes, and supplementing the fov with a rear view camera would actually enhance safety. I realise, of course, that I’m on a bumpy road (sorry), here though.
Still, I’d like to prove the concept in any case.
Cheers
Rich
Sorry, my last post hasn’t landed where it should have, I appear to be unable to reply to my earlier post – I’m on a different machine, not sure if that’s why. Hey ho, apologies for the confusion.
I think this instance of wordpress only allows something like 2 levels of threading on a discussion. So any more than that gets dumped at the end. Don’t worry about it. I might be able to tweak it up a bit, but I doubt it will help this thread. :)
(I’ve changed it from 5 levels to 8 – see if it helps)
Could also be that I’ve over-tweaked the browser settings on my home machine, I wouldn’t be surprised. Thanks for understanding though.
R
You are probably OK on your bike – I could not see anything in either the The Pedal Cycles (Construction and Use) Regulations 1983 or the The Pedal Bicycles (Safety) Regulations 2010 regulations that might be relevant.
The other thing to be aware of with dash cams is that in some accidents the drivers or passengers heads can come into contact with the windscreen. The rear view mirror is designed with a ‘weak’ point so it shear off if hit before it can cause injury. I am not sure what the design / construction requirements are for dash cams and how they comply with the safety requirements.
Yes I think good old-fashioned common-sense is what the law can’t often cater for. Just delivered my son to his bus stop in town (while still dark) and only just saw a middle-aged idiot crossing the road because of a tiny reflective strip on his dark clothing. Then on the way back two cyclists without lights. I must be getting old because I just think that’s utterly stupid. I have my bike lights on even during the day as I want to be as visible as possible.