In part 2 we got as far as a proof of concept, but I decided I didn’t like the screen I had because the touch overlay made it reflecty and ‘ghosty’. But I can’t find a decent small HDMI screen without a touch overlay. Another revelation followed…
What About Composite?
MAJOR CHANGE OF DIRECTION #2
I remembered I’d used a small composite screen with RasPiCamcorder 2. But I couldn’t find it. I vaguely remember I might have broken it somehow, but I bought another one on Amazon for £12.99 (it’s 480 x 272 pixels).
RasPiCamcorder 2 composite screen
And while I was waiting for that to arrive I got on with the software.
Software work
These were the notes I’d left myself at the bottom of the script for things which needed work…
# need to work out how to get it to restart after a natural finish

# need to do some work on deleting the oldest files once a certain threshold is reached

# this bash command will do the deleting for us - either call is as a script

# or run it from the program probs call it from a script

# stat --printf='%Y %n\0' *.h264 | sort -z | sed -zn '1s/[^ ]\{1,\} //p' |  xargs -0 rm
I think I’ve now got the guts of my python dashcam working as I wanted it. I’ve added…
- ‘pruning’ out the oldest .h264 files when the card reaches a certain % full
- And continuous recording 300 second files with incrementing file numbers
I managed to ‘plumb in’ the continuous recording without completely destroying the existing program, so it works. YAY. Took me an hour or two. Quite pleased.
So now once you press ‘record’ it will record for 5 minutes then after a split-second interruption it will start a new file (as long as there’s space on the SD card – if there isn’t it will delete oldest .h264 files until there is) and keep doing that until I press the stop button (or the battery runs out).
I also put the “delete oldest file” code in a separate executable bash script called delete_oldest_.h264.sh
To make things easier to see on a tiny low-res screen I changed the console font to a larger one with…
sudo dpkg-reconfigure console-setup
I chose VGA font with size 16 x 28. It’s quite a comfortable size to work with in the command line environment on a large screen too.
Make it Start on Boot
Having got the software working as I wanted it, it was time to make it fire up on boot. I won’t have a keyboard with me on the bike. The modern way to do this is with systemd. I usually follow Matt Hawkins’ procedure for this…
However, I discovered a hitch. The program craps out if run from either systemd or rc.local
The error messages showed it was something to do with the file removal bash script.
From previous experience working with things called by the system (e.g. cron or rc.local) I realised I probably needed to change the code in the bash script to contain the full path of the directory we’re working in.
It worked fine once I put the full path in the bash script.
I also discovered that, for this application, I prefer the rc.local method as it outputs to the console by default. With systemd you can do this but it requires extra configuration.
File Size Musings
A 5 minute video at 1080p25 and 15000000 bps uses ~558 MB. With 11 GB free (on a 16 GB card) there will be room for 19 or so files if using 100% of the card.
That’s about an hour and a half. Not enough for long touring videos, but should be plenty for dashcam use.
Next I left it running on continuous record to check that it would work as intended.
First time I let it run for multiple 5 minute sessions and then tried to stop it, but the stop button was unresponsive. This needs a further look. Maybe shorter sessions would work a bit better? WJDK. (After further investigation I couldn’t repeat the issue, so concluded it might have been due to all the testing I’d done in the same session. A reboot completely cleared it.)
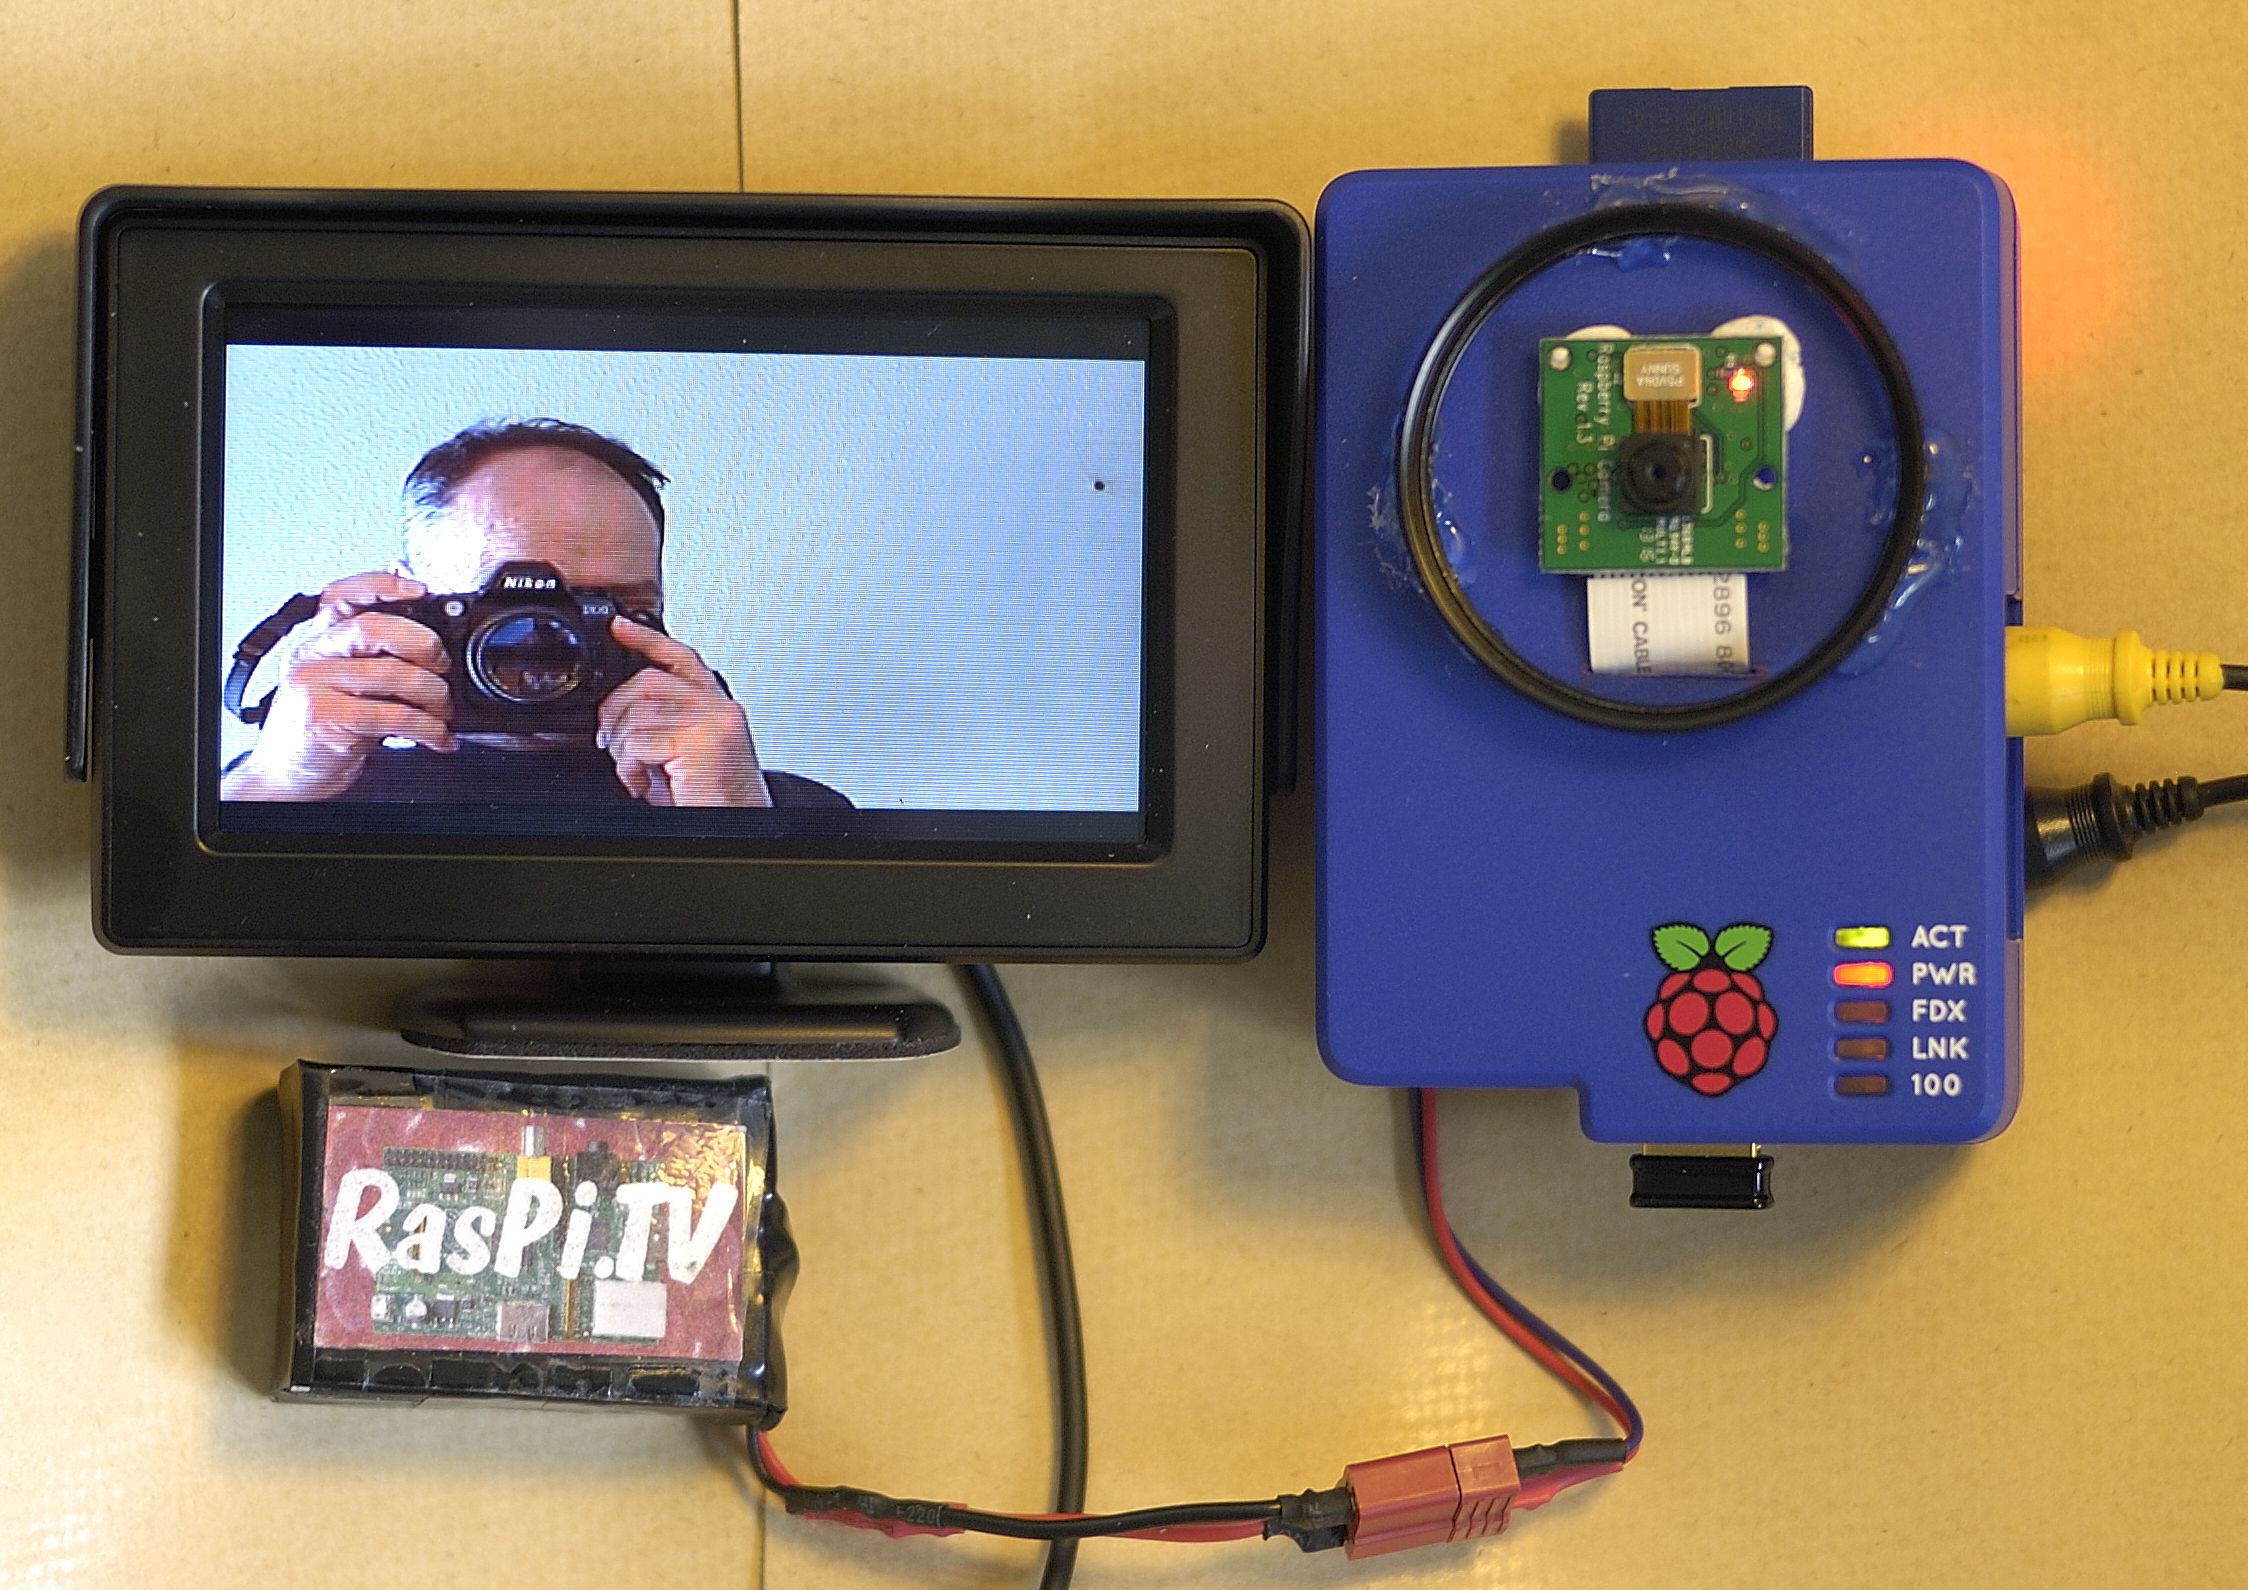
The Screen is Here!

Composite screen connected to rear camera Pi Zero W
The composite screen arrived, it requires a 12V supply (>9V) I have plenty of 3-cell lipos that will manage that. It has white connector for reversing camera and yellow for ‘other video equipment’ so I’m hoping I can hook up both front and rear to it and maybe switch between them using the buttons on the back of the screen if needed. (We’ll see how that works).
I found an ideal dual composite lead in the box of an old Nikon compact camera no longer in use.
Problematic Workshop Session Followed
There followed a workshop session with lots going wrong. I had to desolder the bottom button to put a header on the Zero W’s composite connection holes. Then I realised the new header was partly in the way of the camera ribbon cable. I also dropped my magnifying loupe, which popped apart and needed fixing. I also had a ‘mare with the desoldering, but got it all together again without killing any parts and tested it. It works well with the new composite screen. Not sure I haven’t defocussed the camera slightly, but will stick with this one for now. Once I have the SD card image finished I can duplicate these setups at will. (The front camera will be a duplicate of this.)
The hardware ‘build’ isn’t very complex. 2 buttons a 2-pin header, soldering some cables. A friend suggested hard-wiring the power as well, which is also an option to not expose any connectors.
The new screen uses about 50 mA on a 3 cell lipo (~12V). So 2200 mAh will last a LONG time ~44 hrs. I could easily get away with a much smaller lipo.
Cloned the Image
I cloned the µSD card at this point as any changes made now will just be tweaks to Python script.
Used the built-in utility on Raspbian on a Pi3B+ (booted the card then copied it to another µSD card). Obviously I realised once I’d started that it would have been quicker if it wasn’t full of bogus video test files.
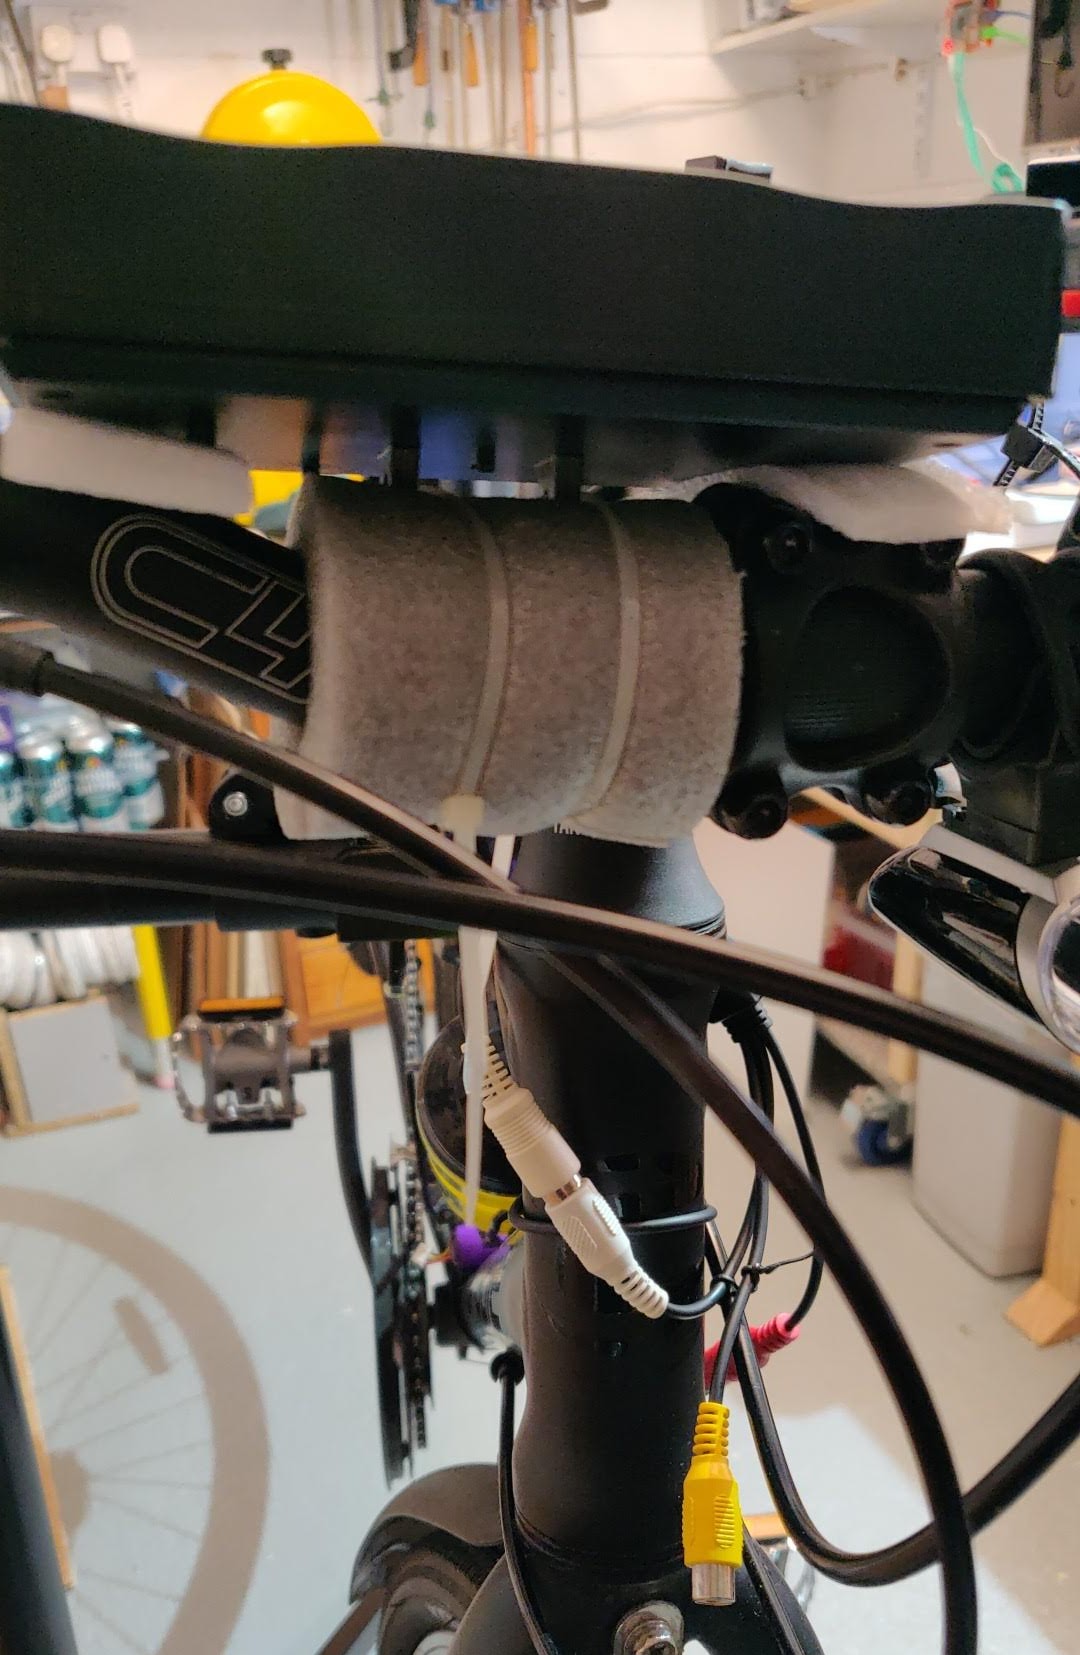
Quick and dirty screen mount for testing
The screen is a bit smaller than my phone and I have a spare bike phone mount which might fit.
I removed the stand from the screen. Not sure if the ‘hood’ will be able to stay on either.
In fact that phone mount wasn’t any good – too much play. So I cobbled up a quick and dirty temporary mount with pipe lagging and cable ties.

Temporary installation of the whole system for testing
The lipo for powering the screen sits nicely under bottle cage #2 with velcro straps.
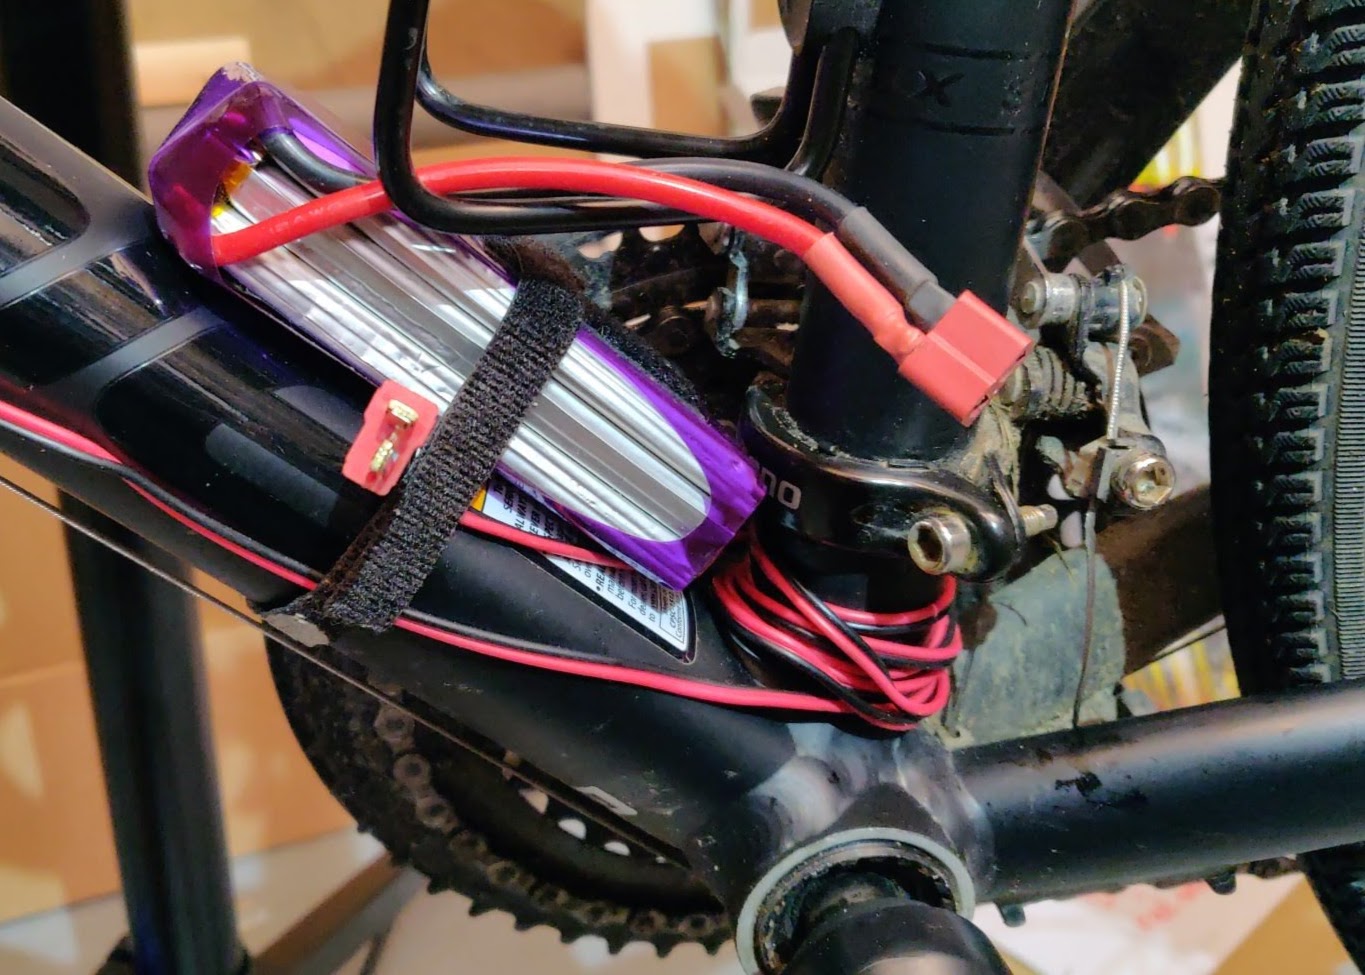
Screen lipo fits nicely under bottle cage.
The USB pack for the rear camera can be strapped to the bike frame or the saddle bag.

Rear battery for the Zero W sits on the saddlebag
Oh Flip!
Once I’d got it installed ‘quick and dirty’ I fired it up and realised very quickly that I should ‘horizontally flip’ (-hf) the display so that it looks ‘mirrored’ – as it would in a rear-view mirror. Otherwise it ‘doesn’t look right’ and will be confusing.
The screen needs a custom mount really. I wonder if I can make a ‘GoPro style’ mount making use of the existing mouldings on the back of the screen?
Here’s a quick phone video walk-round of the system…
Hopefully I’ll be able to do a ride test tomorrow.
Cool, have fun on your test ride! Don’t forget to actually look where you’re going and not just watch the screen all the time ;-)
“I could easily get away with a much smaller lipo.”
Or maybe you could have a single lipo powering both Pis? (which would presumably make battery charging and power management much easier?)
Oh, and nice stack of “inspiration drinks” in your workshop too :-D
With that kind of ‘justification’ I ought to be able to expense them :)