The installation ‘proper’ was finished in the previous post (part 4), so I grabbed a small ‘weather window’ and went out for a 16 mile ride on one of my regular routes to test out the system. It was very windy and rather cloudy but I was very keen to see how the bike dashcam would perform in a real-life situation. What can I say? It worked perfectly as an electronic rear-view ‘mirror’ all the way round. With the Perspex ‘wedge shim’ it was pointed at exactly the right angle. I could see whether there […more…]
In part 3 the hardware and software were all working and attached temporarily to the bike. So now it was time to have a quick test ride up and down the street. Having shot some trial footage, I realised immediately that I needed to change the angle to point the camera down more. Once that was done by shoving a piece of foam in between the saddlebag and Pi (at the top) it became usable. The 4.2″ screen is a decent size and is easy to see while riding. You can clearly see what’s behind […more…]
In part 2 we got as far as a proof of concept, but I decided I didn’t like the screen I had because the touch overlay made it reflecty and ‘ghosty’. But I can’t find a decent small HDMI screen without a touch overlay. Another revelation followed… What About Composite? MAJOR CHANGE OF DIRECTION #2 I remembered I’d used a small composite screen with RasPiCamcorder 2. But I couldn’t find it. I vaguely remember I might have broken it somehow, but I bought another one on Amazon for £12.99 (it’s 480 x 272 pixels). And […more…]
In part 1, I covered the initial concept’s ‘evening 1 musings’. Now it’s time to get going on the project and see if we can make it work… Getting Access Point Running on 3A+ I went through this procedure… Set up wireless access point on Raspbian Stretch stopping at the part “Add routing and masquerade” as it seemed unnecessary (there is no ethernet port on a Pi3A+). Then I could log into the 3A+ from my mac. I connected up the screen and tested it with the camera. The AP seemed OK with the screen […more…]
Anyone who follows me on twitter can’t fail to have noticed some cycling related comments recently. Yes, cycling is the current interest. I’ve ridden about 1100 miles in the last 6 months and have learned enough to bore you to death with talk of heart zones and various items of clothing you can buy to make winter rides more bearable. But I won’t! Although I will say that I’m reliably informed by close friends that simultaneously wearing both my balaclava in ‘full ninja’ mode AND my cycle helmet cover makes me look like a ‘tit’. […more…]
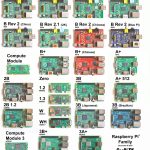
When a new Raspberry Pi model is released, I like to add it to the Pi Family Photo. The aim of doing this is to maintain a record of pretty much all of the versions of the Raspberry Pi which could be purchased by the public. (I don’t include prototypes.) What’s New This Time? A few people commented at the last update (Pi3B+) back in March that I hadn’t included the Zero WH. The reason for that was that I didn’t own one. I hadn’t considered it a ‘new Pi’ because it was the same […more…]
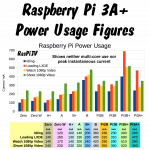
When a new Pi comes out, I usually publish some power consumption figures, mainly for those people who want to estimate battery durations. So my tests are quite simple. Procedure With just an HDMI screen and a USB keyboard/mouse dongle connected, the Pi is powered using a bench power supply at 5.2V (supply current limit = 3 Amps) wired, via my eMeter’s calibrated 20 Amp shunt, to the µUSB power input on the Pi. Current and voltage are measured using the eMeter (with clamp meter to confirm) and calibrated shunt whilst performing four different activities […more…]