The installation ‘proper’ was finished in the previous post (part 4), so I grabbed a small ‘weather window’ and went out for a 16 mile ride on one of my regular routes to test out the system. It was very windy and rather cloudy but I was very keen to see how the bike dashcam would perform in a real-life situation.
What can I say? It worked perfectly as an electronic rear-view ‘mirror’ all the way round. With the Perspex ‘wedge shim’ it was pointed at exactly the right angle. I could see whether there was a vehicle coming up behind me and what it was. It was wonderful. I’m so pleased with the outcome.
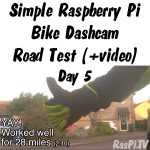
The following day the weather was much nicer. The sun even came out, so I went out for a 28 mile (~2 hours 10 minutes) ride to give it a proper test. The hardware and software worked well. I did notice an occasional ‘judder’ on the screen. One time a van was passing me and I happened to notice the screen paused for a few frames and then caught up again (I caught and flagged that on the video). But that’s the ONLY fault with it, and a couple of dropped frames won’t matter.
Here’s a Rough Video (no audio)
I’ve grabbed a selection of clips from the footage to show you an example of what the video output is like…
Issues?
The biggest issue for ‘evidence’ dashcam use was under-exposure when shooting ‘into the sun’. All cameras struggle with this but perhaps not this much. When facing the sun, the whole picture was very under-exposed and dark and not very useful (still good enough to see what’s behind you, but not to read the license plate). I might be able to improve this a bit by angling the camera downward a bit more to reduce the amount of sky in the shot. I’ll probably make that little tweak.
I think the lens focus could do with a slight tweak to get sharper distance shots. But after already breaking two cameras this week, I don’t feel inclined to mess with it at the moment.
Also, an installation issue – removing the saddlebag is more effort than it needs to be. I need to insert an additional connector junction in the composite video cable so I don’t have to unwind/rewind/re-route the whole length of it every time. I could/should probably secure the rear battery a bit better too.
What Next?
But apart from that, I’m now going to add a front camera and the job is virtually done. It’s a very big help to me, when riding, to be able to see what’s behind me without turning my head. It will also help me not to be scared ‘witless’ by other cyclists overtaking. I can normally hear cars coming several hundred metres away (before I can see them on the screen usually) but bikes you only hear as they’re whizzing past and it can make you jump.
As you can see from the video footage, it’s not as sharp or well exposed as a purpose-built, consumer dashcam, but don’t forget I made this as a rear-view mirror for which it is PERFECT. And the only part I bought was the £13 screen. Everything else was from my ‘kit pile’. The main components are…
- $8 Zerocam
- £10 Pi Zero W
- £6 SanDisk 16GB µSD card
- £13 screen
I couldn’t be happier with the outcome. Anything added from here on in is ‘feature-creep’, although I expect there will be some because it’s been great fun.
Brilliant project and one I also hope to try :-) very well done and looking forward to the next ‘feature-creep’ update.
Unsubscribed, due to distinctly tacky, click-baity ads in the latest email newsletter.
I don’t have an email newsletter so don’t know what you’re talking about.
In which case, you have my apologies. WordPress is adding them to post announcements in a way that makes it look like you opted in to something : https://imgur.com/5wyTJOr
Oh I hate that stuff. I might have to see if I can find a way to kill it