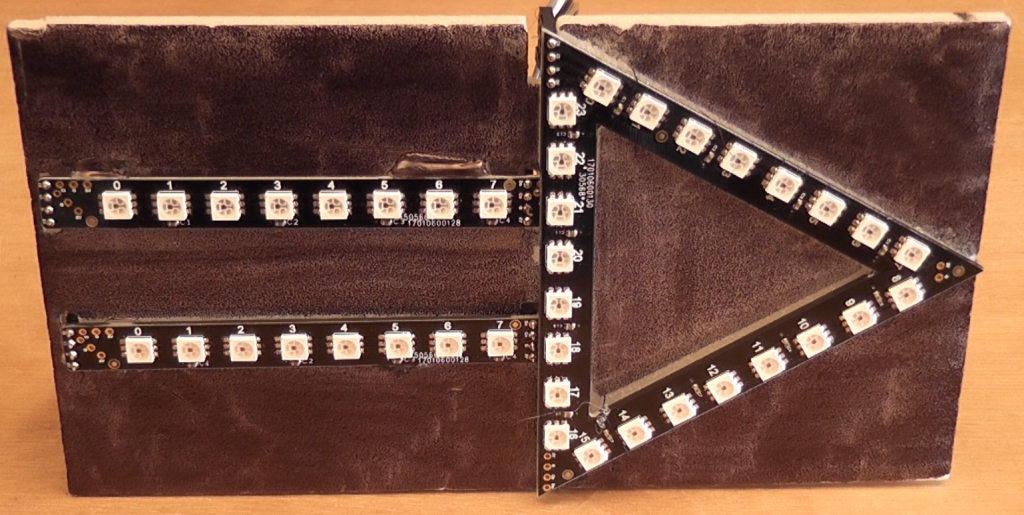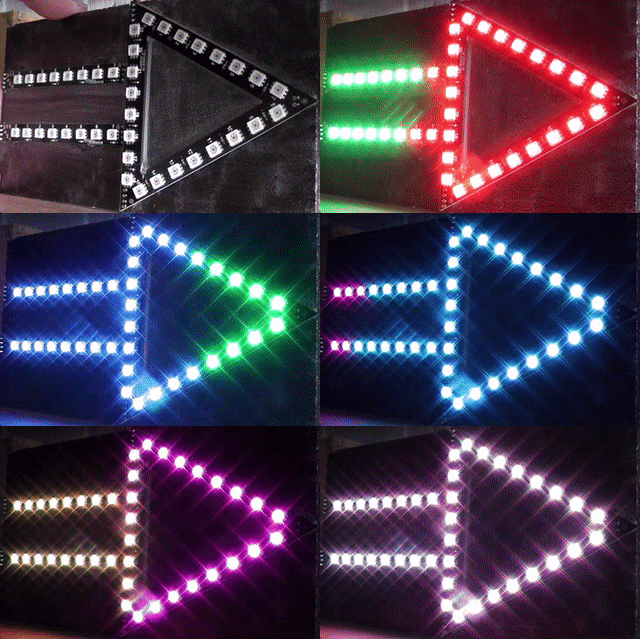
One of the interesting usage possibilities for the RasPiO InsPiRing system is illuminated signage. What could be better than flashy, blinky, multi-coloured signage? Well, not much really? So I decided to make an arrow out of two straight 8s and a triangle.
I used white depron foam as a base, ordinary headers and jumper wires to connect all the shapes to each other and to the controller. Then a needle and thread and some hot glue to fasten the shapes to the depron. I then darkened the foam with a marker pen. This is what it looks like.
I got it all working on a Raspberry Pi in Python to begin with, then decided to port the code to Arduino and use a Wemos D1 mini (ESP8266) for my ‘on location’ shoot (just power it up and go – no screen or keyboard required).
Here’s the Python Code
from time import sleep
import apa

numleds = 40    # number of LEDs in our display
delay = 0.04
brightness = 0xFF  # set phasers to MAX

ledstrip = apa.Apa(numleds)

ledstrip.flush_leds()
ledstrip.zero_leds()
ledstrip.write_leds()

levels = [[0,8],[1,9],[2,10],[3,11],[4,12],[5,13],[6,14],[7,15],
          [32,33,34,35,36,37,38,39],[16,31],[17,30],[18,29],
          [19,28],[20,27],[21,26],[22,25],[23,24]]

def scroll(b,g,r):
    for level in levels:
        for led in level:
            ledstrip.led_values[led] = [brightness, b, g, r]
        ledstrip.write_leds()
        sleep(delay)

try:
    while True:
        scroll(255,0,0)
        scroll(0,255,0)
        scroll(0,0,255)
        scroll(255,255,0)
        scroll(0,255,255)
        scroll(255,255,255)

finally:
    print("/nAll LEDs OFF - BYE!/n")
    ledstrip.zero_leds()
    ledstrip.write_leds()
Here’s the Arduino Sketch Code
This sketch uses the FastLED library which already has a driver for APA102. It can do native SPI on supported devices, but I haven’t managed to get this to work on a Wemos D1 mini, so using bit-banging on pins 7 & 5.
#define FASTLED_ESP8266_D1_PIN_ORDER
#include<FastLED.h>
#define NUM_LEDS 40
#define DATA_PIN 7
#define CLOCK_PIN 5

CRGBArray<NUM_LEDS> leds;

    void setup() {
        FastLED.addLeds<APA102, DATA_PIN, CLOCK_PIN, BGR, DATA_RATE_MHZ(12)>(leds, NUM_LEDS);
        FastLED.clear();
    }

int delay_ms = 40;
int levels[17][2] = {{0,8},{1,9},{2,10},{3,11},{4,12},{5,13},{6,14},{7,15},{32,33},{16,31},
                    {17,30},{18,29},{19,28},{20,27},{21,26},{22,25},{23,24}
};

void arrow(int red, int green, int blue){
      for(int i=0; i<17; i++){
          if (i == 8){
            for(int j=32; j<40; j++){
              leds[j].setRGB(red, green, blue);
            }
          }
          else {
            leds[levels[i][0]].setRGB(red, green, blue);
            leds[levels[i][1]].setRGB(red, green, blue);
          }
          delay(delay_ms);
          FastLED.show();
      }
      FastLED.show();
      delay(delay_ms);
}

void loop() {
      arrow(255,0,0);        //RED
      arrow(0,255,0);        //GREEN
      arrow(0,0,255);        //BLUE
      arrow(0, 125, 255);    //CYAN
      arrow(255, 0, 125);    //MAGENTA
      arrow(255, 125, 0);    //YELLOW
      arrow(255, 125, 125);  //WHITE


Where could I buy this already made? Thanks.
It’s not available ready made, but you can get the parts at https://shop.rasp.io/collections/raspio-collection/products/raspio-inspiring-programmable-rgb-led-shapes-super-bright-and-colourful