Quick2Wire Pi Interface (Beta) review
The Quick2Wire Pi Interface Board is a new interface board for the Raspberry Pi. It’s not yet released, but it is in Beta. I managed to get hold of one of the Beta kits for research and review. :) I also had a chat with Romilly Cocking, Director of Quick2Wire (more on that at the end).
So, What’s in the kit?
- 1 PCB
- 1 Ribbon cable (nice colours)
- 4 jumpers
- 11 assorted headers
- 2 FETs
- 1 tantalum capacitor
- 1 LED
- 1 push button
- 3V3 voltage regulator
- 1 diode array
- 16 resistors

Quick2wire interface kit

Quick2wire interface PCB front view

Quick2wire interface PCB rear view
Interface Build
The build was a pleasure. I’d been teaching my son to solder the day before, so I’d left the leaded solder out and the leaded bit on the iron. I decided to go with those for this build. :)
The instructions are clear and the build is quite easy. You could probably build it without the instructions because the excellent silk screen layout shows you most of what you need to know.
The only potential pitfalls are the orientation of the diode array and tantalum capacitor. They both have to be the right way round. The instructions explain how to make that happen. :)
It took me about 20 minutes to do all the resistors. Most of that was being fussy trying to get them lined up nicely – well they were going to be photographed, so they had to look their best ;)
Overall, it took me 53 minutes from start to finish (excluding an extra couple of minutes for fixing a known “Beta” issue requiring an extra wire). It was an enjoyable experience.
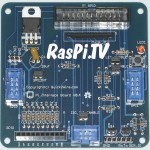
This is what it looks like finished (minus the RasPi.TV watermark)

Front of built up Quick2wire Pi Interface Board
Software Installation
Next step was to fully update Raspbian and install some software to test the interface. The instructions were excellent and software installation worked flawlessly. The longest part was probably the package update (sudo apt-get update/upgrade).
Testing
The thing which stands out here, compared to other Python based GPIO drivers, is that, as long as you are in the “gpio” group there’s no need to be a sudo user to run the commands. This is great!
So now it was time for testing.
- Test commands are given for switching the led on and off. These worked perfectly (although the LED on mine is not very bright).
- Other commands are given for reading the button’s status (pressed or unpressed). This worked perfectly.
- Then you are invited to test your 5V FTDI interface if you have one. I have a similar thing I reviewed last week so I tried it. I got Tx and Rx the wrong way round first time (didn’t bother looking up which was which, just tried both ways until it worked ;) ) but other than that it worked perfectly. I was able to get a tty login through the serial port. :)
And that completed the structured test procedures. Digging a bit deeper than the test manual instructions went, I downloaded the Python Quick2Wire libraries and went through two test programs I found there – flashing the led and using the button to control it. These are, as yet, undocumented. I couldn’t find any documentation of the pin numbers, but worked them out with a multimeter.

Pinouts for Quick2Wire Pi Interface
This isn’t an omission, it just hadn’t been done yet (but it has now). It is still Beta after all. :)
I then found an excellent page on GitHub showing how to do “GPIO stuff” with Quick2Wire. This, combined with the pin information I’d gleaned, was enough to enable me to start playing. It’s worth mentioning that you can use this software library to control GPIO ports regardless of what hardware you have (apart from the Pi itself). So, theoretically, I could write a third Python version of the Gertboard test suite to go with the WiringPi for Python and RPi.GPIO versions. :)
RGB LED
So then I wrote a little script to blink a three colour (Red, Green, Blue – RGB) LED different colour combinations using P7, P6 & P5 on the board. That worked fine, but before I could video it, I accidentally connected the R (red’s) anode to 3V3 instead of P7 and it went “phhhhhhhhhhhhhhhhhhht sizzle”. So it’s now just a GB LED :( But I managed to rustle something up using a different RGB LED for the sake of the video. (It had opposite polarity, so I had to find a way of inverting the trigger voltage. (I’ll bore you with details of how I did that in another blog.)
Another area the Quick2Wire Python libraries stand out (which I haven’t explored yet) is epoll support. This allows you to control things using interrupts instead of continual polling. :yes:
Beta Issues
There was initially a software issue with Rev 2 Pi boards and pin P2 not working, but that’s now fixed. I got all eight GPIO ports behaving as they should (you can see the eight white leds in the video). I’ll be trying out the i2c expander in the near future.
Conclusion
The Quick2Wire Pi Interface is a very nice board with a lot of promise and what looks like being a very good Python Applications Programming Interface (API) behind it. It’s going to be priced cheaper than you’d be able make one yourself. :) Being ultra-fussy, I’d prefer a more visible (brighter) LED. But that’s really the only thing I’d change, which is saying a lot!
The Future?
There’s a lot more Quick2Wire add-on boards in the pipeline, including an analog to digital converter (ADC), motor controllers, lcds, servo controllers etc. It’s going to be a modular system, easy to build and easy to use. There’s even talk of a Scratch interface at some point down the line.
All the hardware and software is open source. The emphasis is on software libraries and much needed free teaching resources. It looks very much to me as if Quick2Wire is one to watch. Here’s a link to their site.
[…] has blogged about beta-testing the board. He's included a really cool video showing off the board and its […]
excellent :-D
When can we buy this greate little circuitboard?
:inlove:
It’s not launched yet, but I should be meeting Romilly Cocking on 6th January. I’ll ask him.
If you want a beta, they’ve just put 50 on sale. http://shop.quick2wire.com/
Otherwise it will be late January.
Excellent design! What delivery date, and prices?