A few months ago I thought it would be cool to use some of my RasPiO InsPiRing LEDs to make some indicators (turn signals) for my bicycle. But then I got busy completing and shipping the InsPiRing KickStarter, and then went away for the summer. But just as I was coming back, Lorraine Underwood tweeted about her High Visibility Jacket which reminded me of the idea. Obviously I wanted to do it my way and install something permanently on the bike with wireless control.
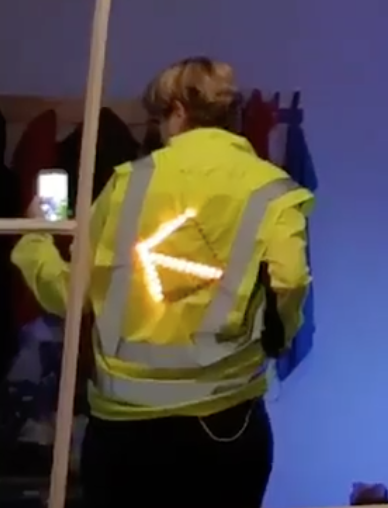
Lorraine’s Microbit Jacket
Also I was due to purchase a new bike, which everyone had given me birthday money for LAST YEAR and I hadn’t even chosen it yet… and this year’s birthday was only about 2 weeks away. EEEEK. Get on with it boy! So I chose and ordered a bike. 2 days after I got it, I decided I needed to do this project RIGHT NOW!
The build was spread out over about 8 or 9 days, part-time, but the total amount of work involved was about 5 working days worth of time. I shot a bit of video as I went, and decided to try and document the development process. It didn’t go entirely as I planned at the outset – development rarely does – but I was able to get “something” up and running as a proof of concept on day 1.
This series will show the development process in “day-sized” chunks. So let’s start with day 1.
Day 1
On day 1, I started messing about with RasPiO InsPiRing shapes to decide how best to go about the project.
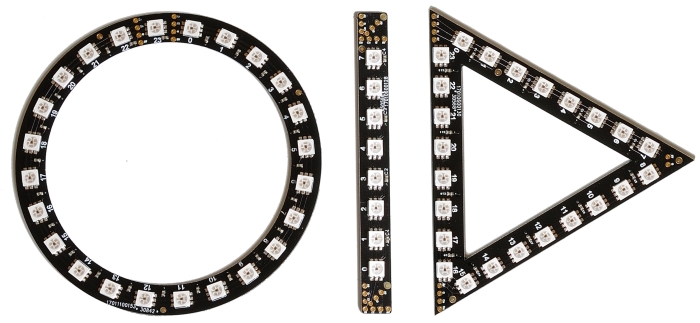
RasPiO InsPiRing LED shapes
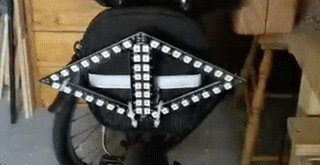
At first I was thinking really only about the rear of the bike. I looked at the saddle bag on my bike and decided to mount something to that. I settled on two triangles – one pointing each way – to denote ‘directional arrows’ which can be animated to help both visibility and understanding.
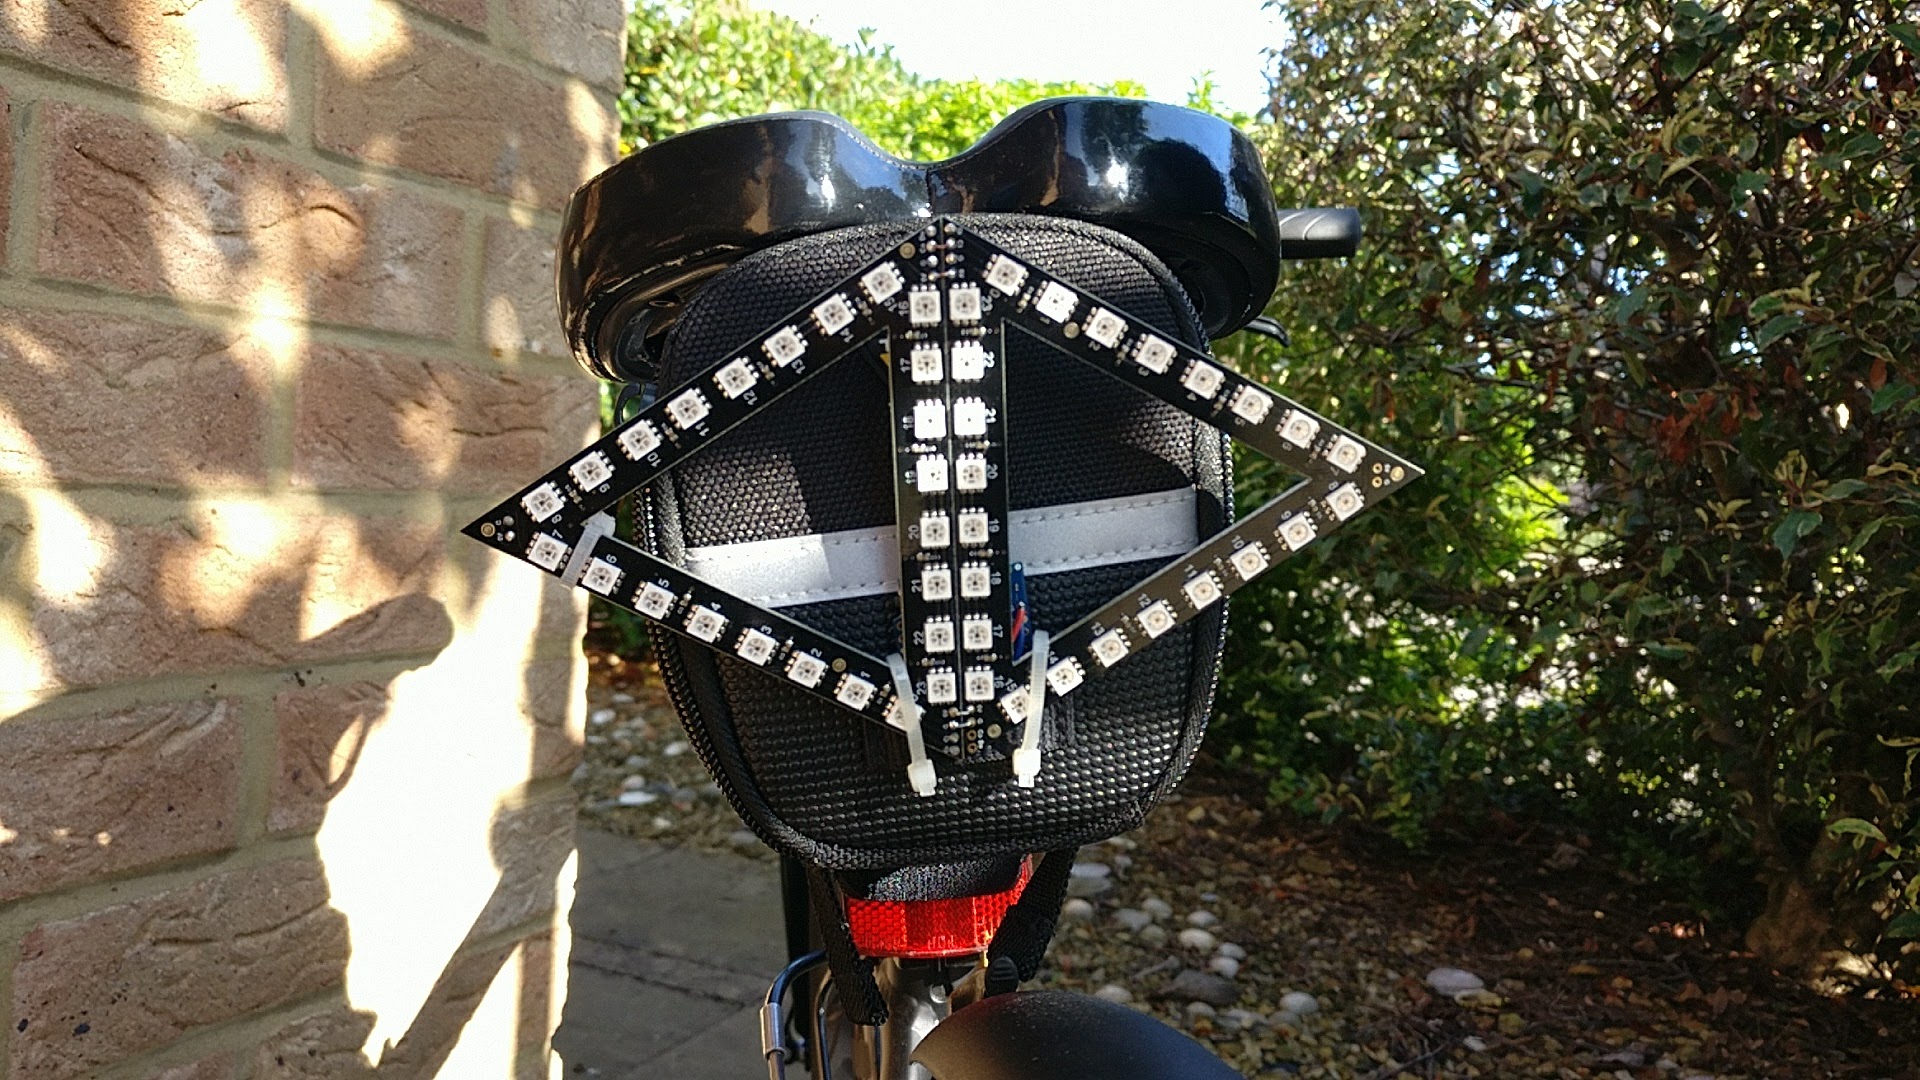
Rear lights mounted on saddlebag
I’d previously done something similar during the RasPiO InsPiRing Kickstarter, making an arrow driven by a Wemos D1 mini (ESP8266).
I’d also been messing around with these Wemos boards quite a bit over the summer, so decided to have a crack at using one of these to control the rear lights. Ultimately I was hoping to use two Wemos D1 mini and get them to talk to each other directly. In the end I decided to use a Pi Zero W on the front, but we’re getting ahead of ourselves (that was a day 3 decision). I want to show you my journey, so first things first.
The first step was to join two triangles and get the ‘arrow’ animation working to see if it fitted the bill. As expected, it did! I was able to adapt the arrow sketch I’d previously written, add in some ‘web serveriness’ for control and make a working proof-of-concept.
Turn right
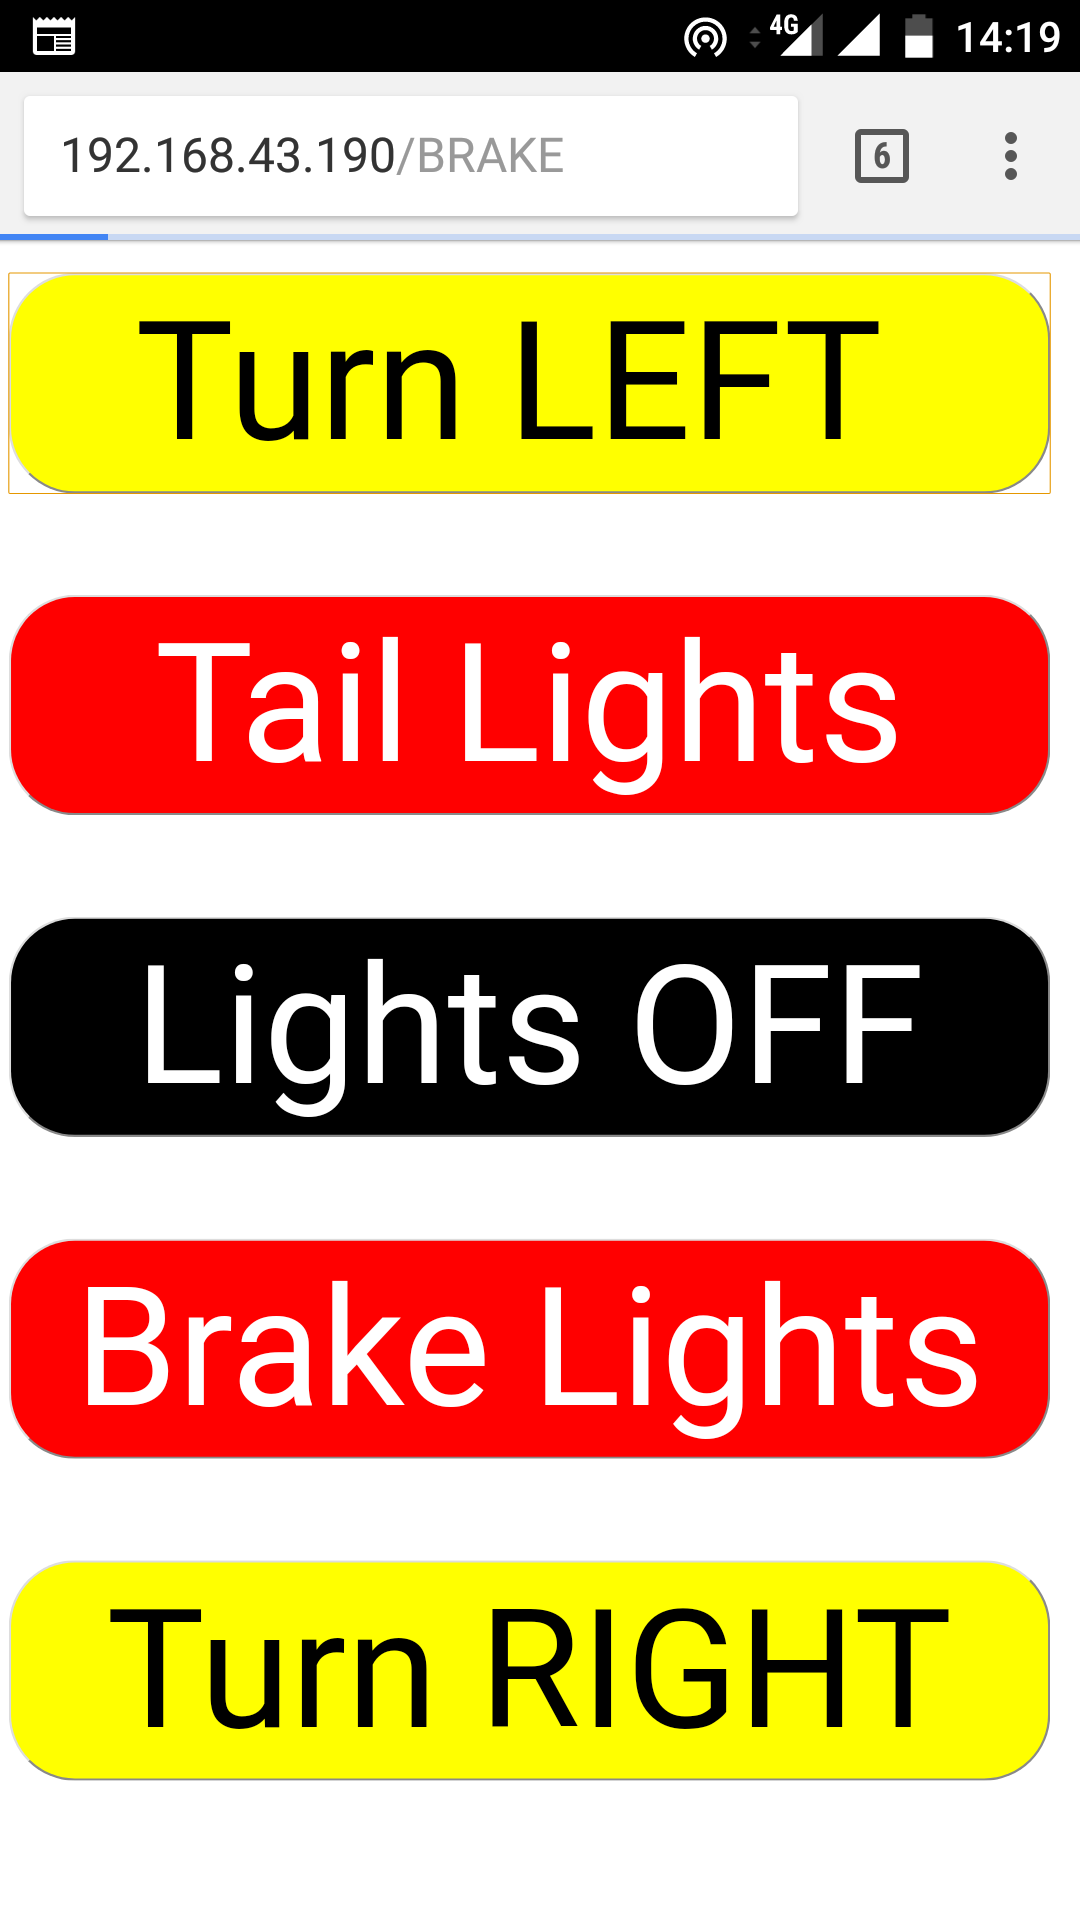
Web interface for control of lights
Next, I needed to be able to control it from the front of the bike. On day 1, I wanted to keep things easy, so used my phone as a WiFi hotspot and used simple http ‘GET’ calls to control the Wemos via a web browser. The web pages are served up by the Wemos acting as a web server. There’s a simple button for each command. Each button links to a different ‘GET’ and triggers a different response. We’ve got LEFT, RIGHT, TAIL, BRAKE & OFF. To begin with, I settled on 10 iterations for each LEFT or RIGHT indication.
I have a mobile phone holder for the bike, so next morning I tried it out for real. It quickly became apparent that this control method was not going to be 100% satisfactory. Bikes are bumpy and touch-screens require precision. You don’t quite know whether you’ve pressed the button properly or not. It’s not really robust enough, but it was good enough for a Day 1 feasibility study. We now know we can…
* receive wireless GET commands with a Wemos
* control and animate the LEDs with a Wemos
* mount the rear lights on the saddlebag with battery inside it
For a first day of development work I was pretty pleased. I’d never done a web interface like this before. Using a bit of CSS it was an awful lot easier than I thought it would be.
So after 1 day, we have a working system, but it needs a lot more refinement to be satisfactory.
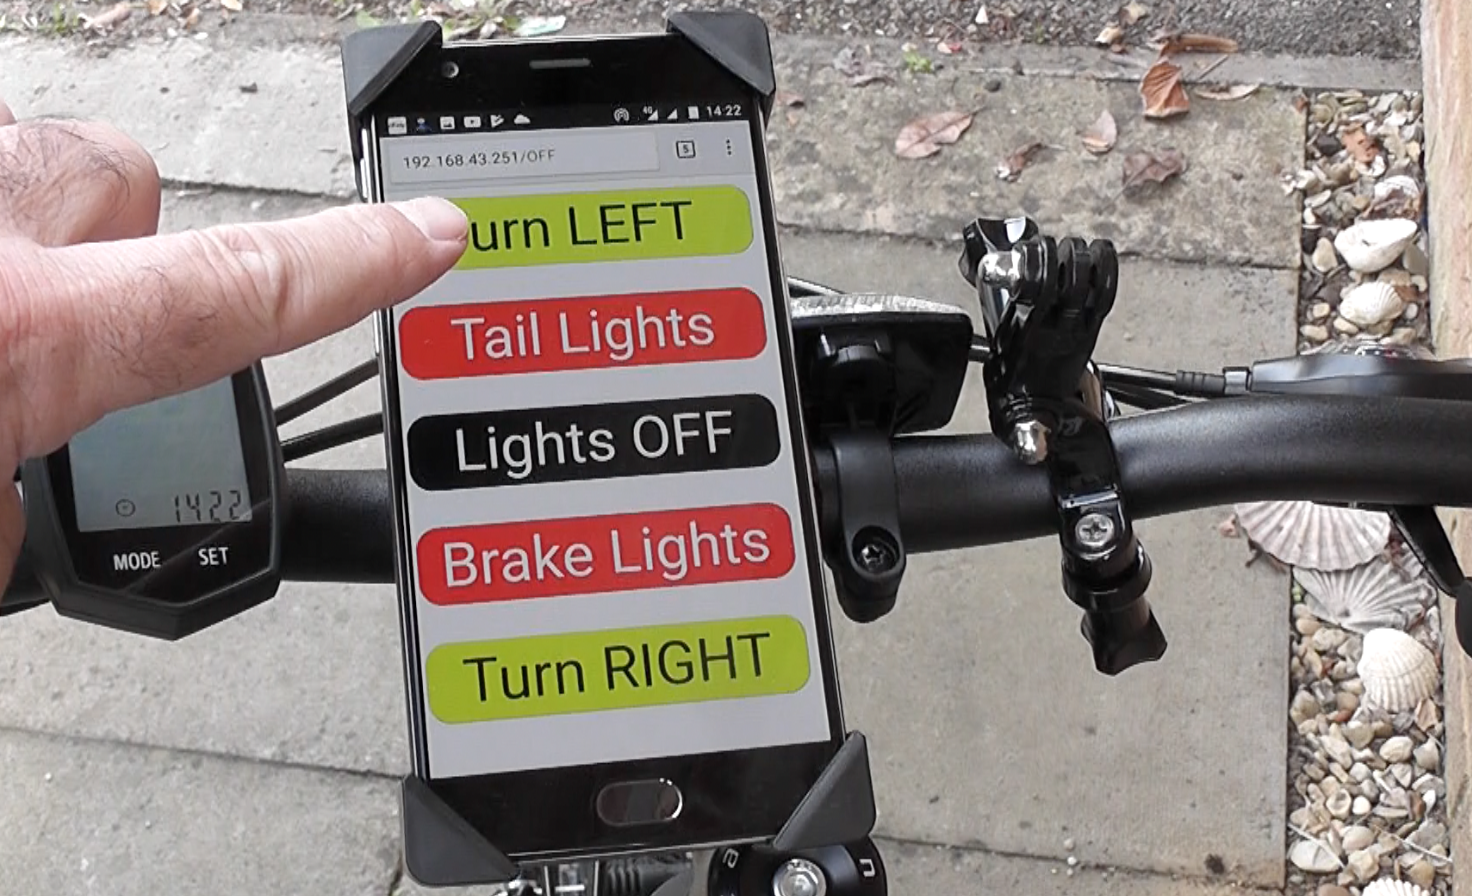
Mobile phone mounted on bike
In day 2, I took it further and started looking at button control and extra lighting on the front. Day 2 can be found here.
You can find all information about RasPiO InsPiRing here
Looks like a fun project, look forward to seeing how it develops / developed. Have you also considered water-proofing, for when the inevitable British rain happens? ;-)
I have thought about casings or heat-shrink options for the lights themselves. I’ve got everthing else covered (literally) as will be seen on day 4 :) I think I’ll try clear heat-shrink first and see if that works well enough. Ultimately some kind of case would be good, but I’m keen not to add too much bulk or weight.
Another option might be some kind of spray-on conformal coating. I believe there are things like that available which may keep the water out. :)
(Update to add: I’ve ordered a small bottle of silicone-based brush-on conformal coating to try. I think that will look a lot better than any other option I can think of.)