You would Pi too if it happened to you :(
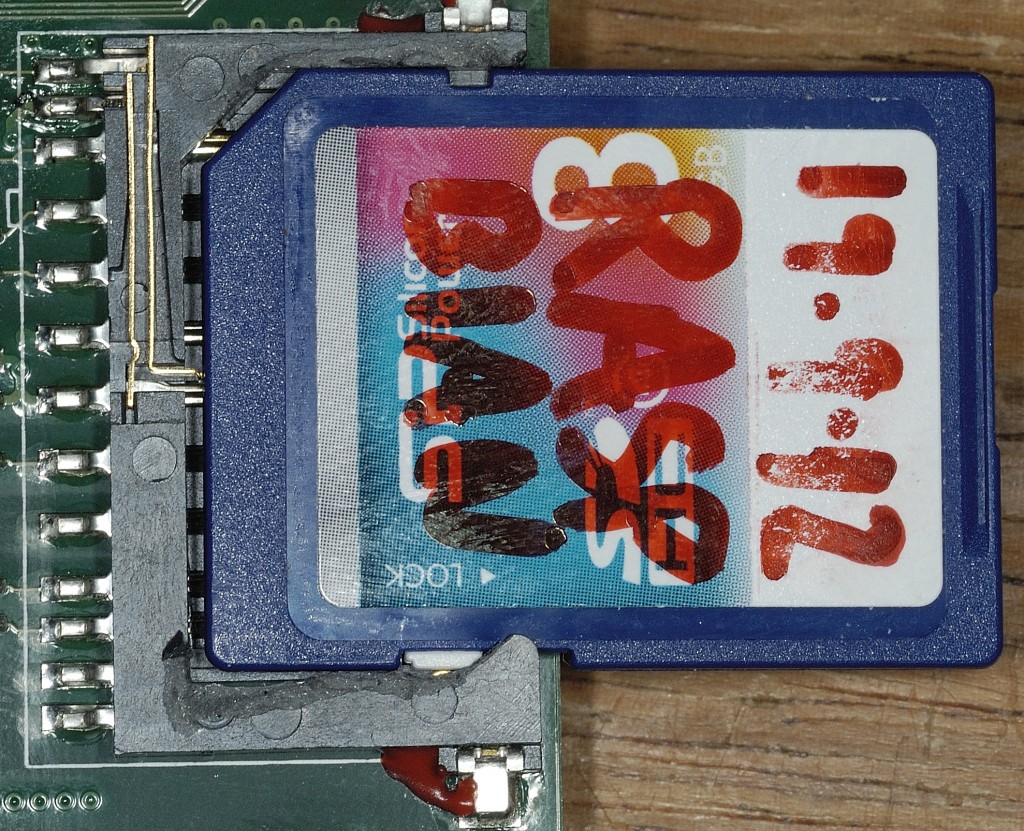
Just as I was finishing up my last blog post, the review of Adafruit Pi Cobbler, my foot snagged on a network cable and hoiked my Pi onto the floor. It landed on the SD card and the feeble card slot took no prisoners.
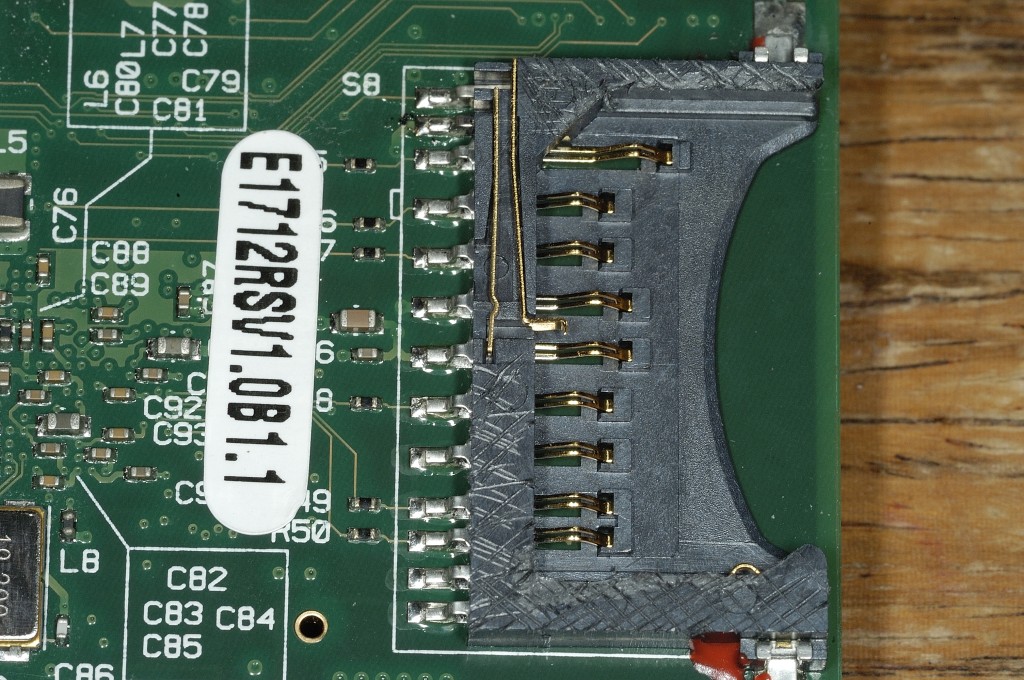
The card slot broke as it was predestined to do, the moment anyone looked at it harshly or in the wrong tone of voice. This Pi, my friend since 15th May 2012, is accustomed to living in a beautiful Yoctopuce case, but was temporarily naked for interfacing. It only agreed to the nudity because it was considered essential to the plot.
So, naked and broken and on the floor, the mighty Pi had fallen from grace. At least it was in a shutdown state, as I’d disconnected it all to do the photos.
We can make this problem go away
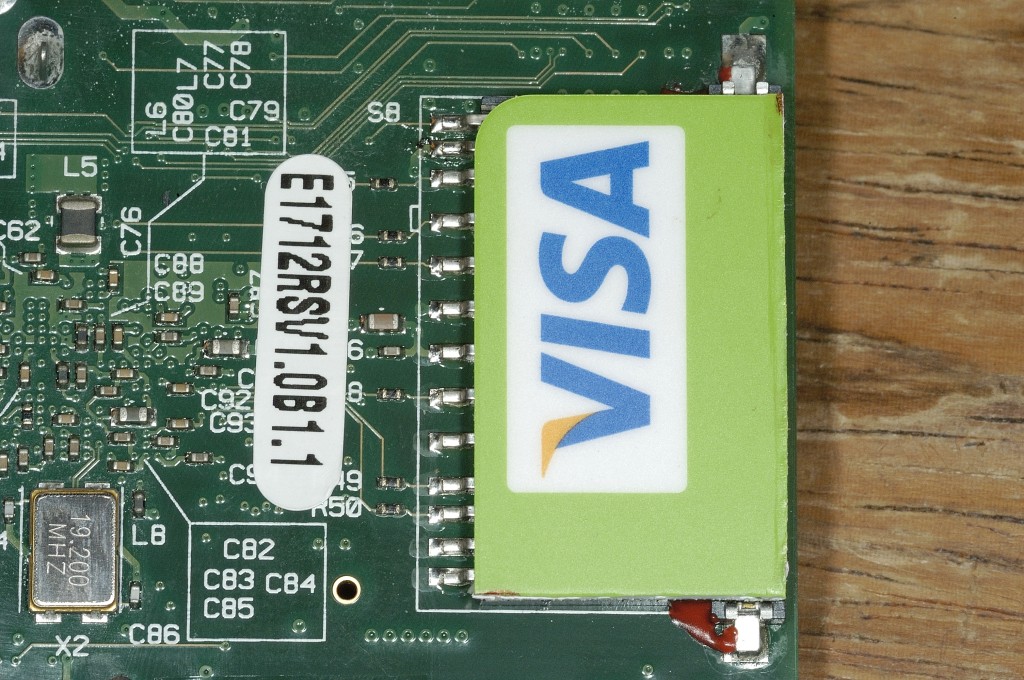
There were two ways to fix the problem. Both of them involved my Visa card. One costs about 30 pounds and the other costs not very much at all. So I chose the cheaper option…
So, how do you do this?
As an aeromodeller, I have supplies of fixit stuff. In this case the required kit is…
- An old credit card (or similar)
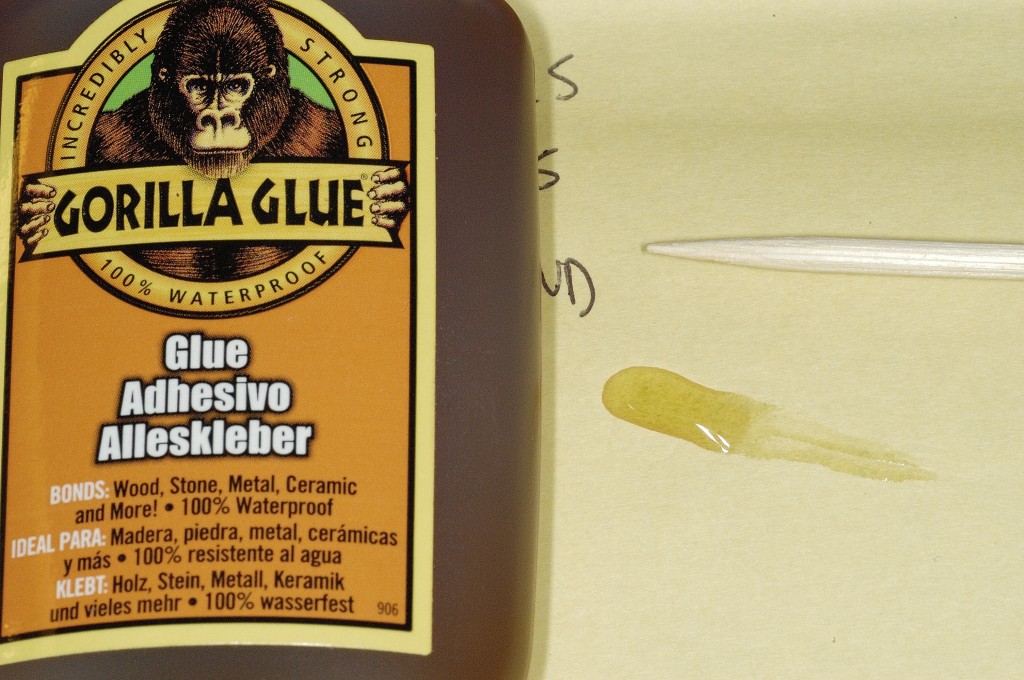
- Gorilla glue (epoxy would do)
- Bamboo skewer
- Piece of paper
- Craft knife
- Decent scissors
- Marker pen
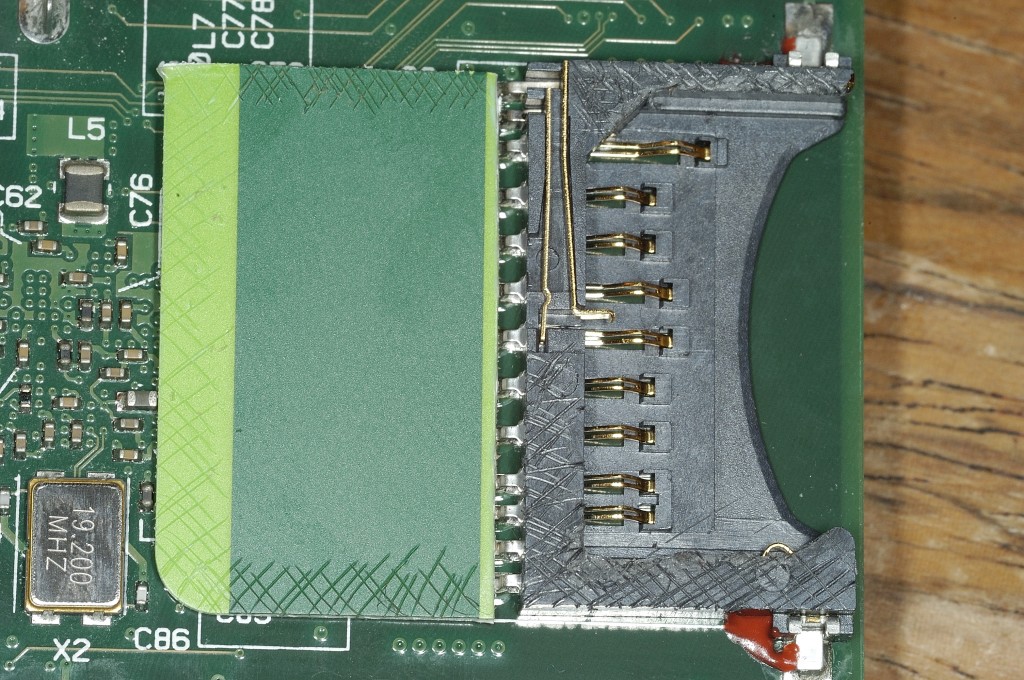
Use the knife to score some lines along the edge of the card slot. This gives the glue a “key”. Gorilla glue is excellent at sticking plastics, but it works better when the surfaces are not polished smooth.
Locate the area of your card that you wish to use, hold it against the slot and mark one side. Cut to size. Do the same for the other side. Remember the old carpenter’s saying “Measure twice, cut once.”
Scuff up the inside of the credit card repair patch to form a key for the glue.
Squirt some glue onto a post-it or similar and use this as a palette.
Use the skewer to smear on a thin coat of Gorilla glue and then scrape most of it off. That stuff expands and if it gets inside the slot you will have trouble putting the SD card in.
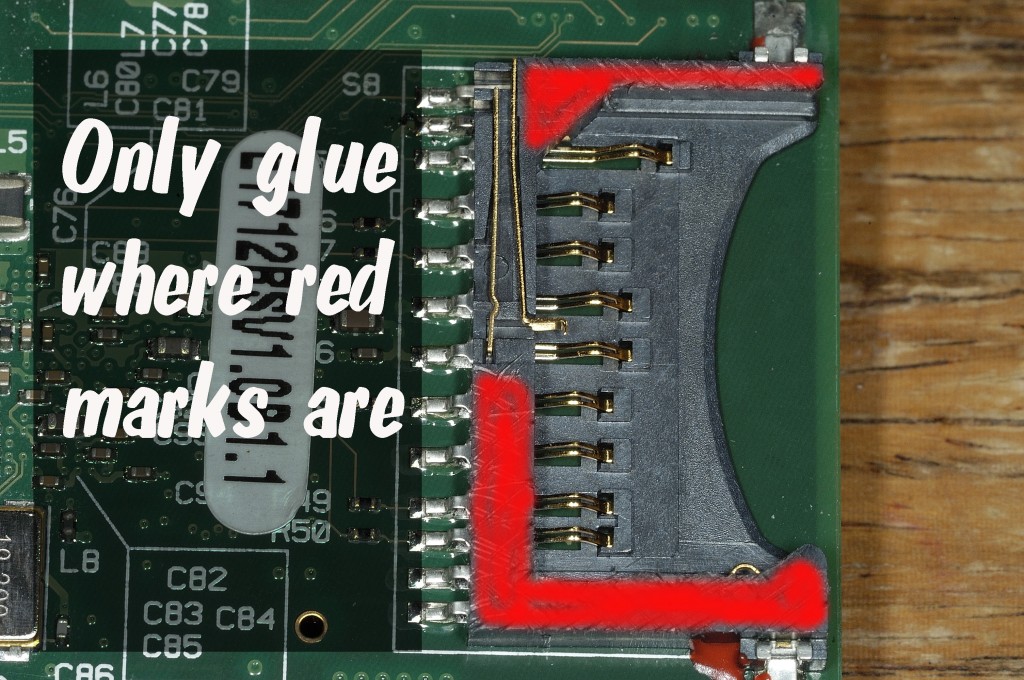
Only put glue in the places marked in red…
Whatever you do, don’t put any near the copper spring contact.
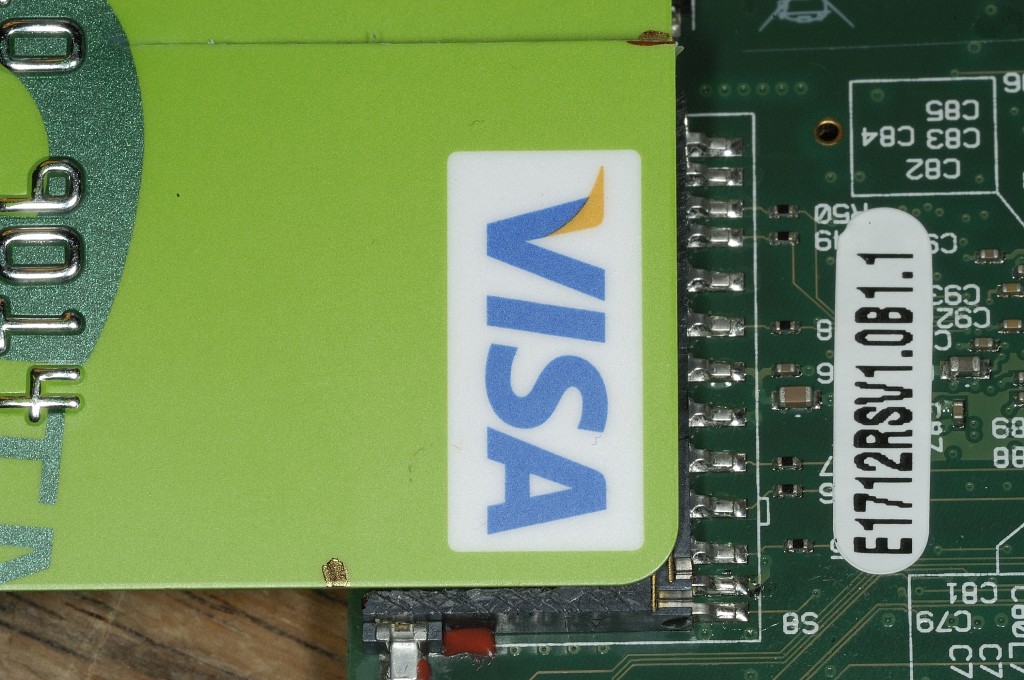
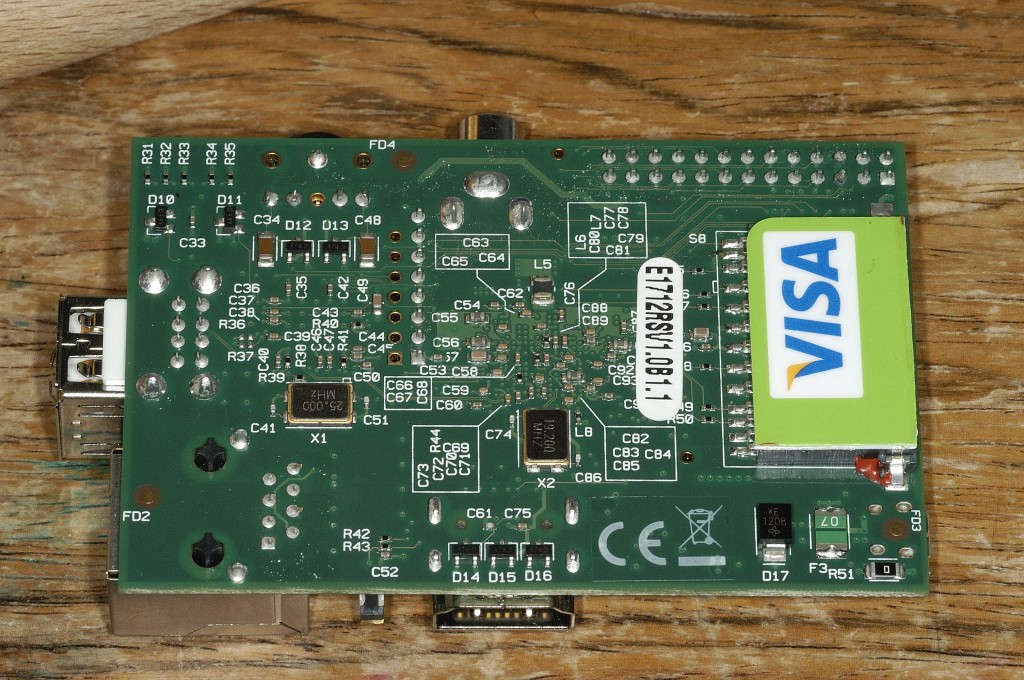
Once you’ve done that, put the repair patch in place and squeeze tight. Leave it alone for at least two hours (full strength in 24 hours).
If you felt you needed to, you could add a load of hot glue on the outside for extra strength. I won’t do that unless it proves absolutely necessary because it will look awful. :)
One more thing
This repair didn’t quite press the SD card firmly enough onto the springy contacts, so it was necessary to wedge in a little strip of thin plastic (more credit card material) between the repair and the SD card. It needs to be pushed in just enough to make contact, but not so much that you break your repair – otherwise you’ll need to visit the ugly hot-glue monster.
Don’t go dropping your Pi again or we’ll send the NSPiCC* round to sort you out!
(In the UK, the NSPCC is the National Society for the Prevention of Cruelty to Children).
Useful tip about Gorilla glue – thanks for that. I hope your repair proves durable. One solution to applying the necessary pressure to the card might be to glue the broken side pieces back in place, if at all possible, before gluing the credit card over the top to keep them there. For future repairs, obviously.
That’s a good idea. I only found one of them. The other pinged off somewhere. I think it thought it was an SMD part (Gertboard assemblers’ in joke). The best solution though is what you ultimately did in your thread – to replace it with a metal socket. But that’s not for the feint-hearted. Gluing is something everyone ought to be able to do. I don’t know how long it’ll last though – particularly with the extra pressure from the additional “shim”.
What a great little site for Raspberry Pi lovers
Many thanks for an excellent post. My tragic story is that I bought as new funky case for the pi. As I was fitting it – the SD card reader broke. I came across this site and it worked. I noted that there was still a need to put some additional plastic in – so I cut the card so that the long number which is stamped and is raised on the card was along the edge of the broken part of the reader. That meant that the SD card was able to have a little bit of help to push down even further and I didnt need any extra shim
So far so good…
What an excellent idea. Does that leave your signature exposed on the other side? ;)
Good thinking. An extra thickness of credit card is just a little too much – maybe the embossed part is just right.
It is. I didn’t shove it in all the way. I think it only got down part of the way. I’ve not been inserting and removing the SD card on that Pi since fixing though, as I’m using it for my temperature monitoring. So I don’t really know how long it will hold up in normal use. But I bought one of those ebay metal SD card slots you linked to on the forums in case it doesn’t last. :-D
Thanks for that. I have received my RPi today after months of waiting and was able to boot it twice…
While disconnecting it after the second boot, the RPi dropped from about 30 cm and …bingo, that was it for me…. They urgently need to come up with a metal SDCard holder or something else a bit more sturdy. These things are FLIMSY!! :reallyangry:
Tomorrow, I’ll give you procedure a go and hope for the best…. Here I was hoping for some quality time with my new toy this weekend. :cry:
You can use a clothespeg or a small craft clamp for a very quick and dirty fix, but one day you’ll have to fix it properly. :)
I hope the glued solution works for you. If not, there’s an account of how I replaced mine here.
I’ve got one of those metal sd card slots in reserve in case the glued one fails. ;)
Much neater than my layers of sellotape and bits of paper with RPi stuffed into a case…
Chance upon this post when I was searching for a quick fix to the spoil sd card holder on my raspberry pi. The embossed side was cut and aligned to bump the sd card to the contacts. No go. So I cut out a thin cardboard packaging (of my new Kingston SD card) and slotted it in as well.
It works! :D
Apparently, replacing the card holder with a generic one works quite well too:
http://madspot.de/?p=397&lang=EN
[…] series of stupid mistakes with your Pi. Part one was dropping Pi 1 and breaking the SD card holder (how to fix that) Part two was sending 5 Volts through the 3v3 pin of Pi 3. (No damage Halleluja) And this was part […]
Followed your instructions and it worked perfectly – used a few layers of sticky tape at the end on the back of the SD to force the connection. many thanks
Glad it worked out for you. Good idea with the tape :)
[…] mais une autre colle semble avoir été efficace : https://raspi.tv/2012/how-to-fix-a-broken-sd-card-slot-on-your-raspberry-pi. L’article est en anglais, mais les photos sont très […]
[…] Attempt repair of the SD Card slot by gluing additional plastic on (a good option, there is a nice guide on how to do this by Raspi_TV: How to fix a broken SD card slot on your raspberry pi) […]
I’ve managed to break my sd card as well, and I’ve just put the sdcard in, and forced in position using a Dinder clip
You can even use a clothespeg, but it’s a bit inconvenient if you want to put the Pi in a case. :)
Awesome !! It worked like a charm !! Thanks for sharing.
The same thing happened to me. I tripped over something and my Pi landed on the inserted card. I had an old cancelled credit card laying about and using your method worked perfectly to reinforce the slot. Thanks for sharing!
You have to use a credit card one way or another, might as well try the cheap option first :)
[…] idea de usar una tarjeta no se me ha ocurrido a mi. Lo he visto aquí: https://raspi.tv/2012/how-to-fix-a-broken-sd-card-slot-on-your-raspberry-pi buscando por “fix a broken sd card slot rapsberry” en […]
Worked like a charm, even with a bent sd card (had to put some pressure while booting up, nothing else)
Of course I read this SECONDS AFTER cutting up my old credit card into unusable pieces.
I was thinking, though, that if you used the part of the card with raised numbers facing down it might help force the contact. Might keep the card from fitting at all, though.
I think someone already did it and it worked well. I wanted the VISA logo facing outwards on mine :)
This is one possible way, but we have invented second. It is faster and does not include solder pen (i think that is called like this) and someone sad safer. We have used super glue, paper and random choosed .plastic desk.
. Team R. U. R. – Jeseník
[…] metal micro SD card slot on the back. Having previously broken (and fixed) two of the plastic ones, I am delighted about this. If you were wondering why the official Swag Store NOOBS cards are […]
[…] I found this website most helpful: https://raspi.tv/2012/how-to-fix-a-broken-sd-card-slot-on-your-raspberry-pi […]
[…] I found this website most helpful: https://raspi.tv/2012/how-to-fix-a-broken-sd-card-slot-on-your-raspberry-pi […]
[…] https://raspi.tv/2012/how-to-fix-a-broken-sd-card-slot-on-your-raspberry-pi http://www.raspberrypi.org/phpBB3/viewtopic.php?f=26&t=7751 […]