

I finally freed up one of my breadboards. I got my semi-permanent temperature sensing interface fully up and running with the Pi Cobbler – logging to COSM.
&show_axis_labels=true&detailed_grid=true&scale=manual&min=-5&max=25&timezone=London)
So now I could take the components off my other breadboard and free up the Gertboard for other experiments.
LCD Next
The next thing I wanted to get working was a 16 x 2 LCD panel. (£6 from Tandy) Having seen other people get these working, I figured it couldn’t be all that hard and it wasn’t too bad actually. But I did make one small mistake along the way. I got it working the second time I tried it.

16 x 2 LCD Screen attached to Raspberry P
The mistake I made was trying to run it from a separate 5 Volt supply instead of directly from the Pi. I hadn’t connected it to the Pi’s earth, which I think is why it didn’t work first time round. Properly grounded, I think it would run from a separate supply (but don’t connect the +ves together or the regulators will have a fight).
5V or 3V3?
There are 3V3 (3.3 Volt) versions of these LCDs available, but the 5V ones are more common. According to my flavour-of-the-month site, Adafruit, it’s safe enough to use a 5 Volt LCD with the Raspberry Pi as long as the read-write pin (pin 5) is connected to ground. As long as we only “write” to the screen and don’t try to take input from it (like you would on some embedded device with input buttons e.g. a battery charger).
That way, you won’t “send” a 5 Volt signal to the Pi’s GPIO (General Purpose Input Output) ports, which run on 3V3. Sending a 5 Volt signal to a 3V3 port would be very likely to toast the port. This is the basis of the instructions I followed…
http://learn.adafruit.com/drive-a-16×2-lcd-directly-with-a-raspberry-pi/overview
…but I didn’t use the Pi Cobbler this time as it’s already in use with my semi-permanent temperature logging setup. Once I get that onto a permanent board, the Cobbler will be free again.
Identifying the pinouts
I very carefully identified the pinouts on the Raspberry Pi’s GPIO header using this very helpful graphic from the wiki.
GPIO Pinouts on the Raspberry Pi
And connected eight wires to the ports directly.

Port wiring for the LCD screen
Odd behaviour
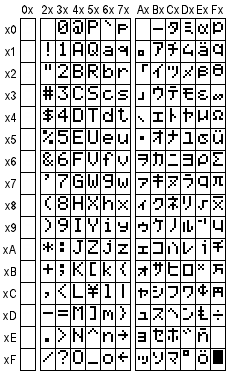
I’ve noticed a few times that this screen sometimes needs the scripts to be run a couple of times before it works properly. I don’t have an explanation for that. Once or twice it has displayed what looks like Japanese characters instead of Roman alpha-numerics.

Some Japanese characters?
It might be that I haven’t used the Adafruit scripts properly, or it may be that they’re optimised for their own distro. No matter. On this occasion, the solution lay elsewhere. Eventually I switched to another driver by Matt Hawkins, from here.
New driver cured it
And after a bit of tweaking it finally does exactly what I want, reliably – yay :)

Success at last – degree symbol too ;)
Now this little LCD is displaying data pulled from my COSM temperature feed every 40 seconds. As I progressively add more sensors, I’ll be able to alternate the display, showing each set of readings for a few seconds before going on to the next. I’ve got plans for barometric pressure and light sensors already – who knows what else will crop up to occupy the remaining channels on the ADC? :rotfl: (Currently four channels available).
Why is there a ‘screw’ in the middle of your Raspi? Amusing heatsink?
It was done as a bit of fun when I displayed the Pi and Gertboard at a Raspberry Jam (MK). It’s just a cut-off screw head hot glued to the SoC package. Yes it does act a little bit as a heatsink, but the SoC doesn’t need one. It’s a laugh really :-D
[…] since getting the LCD working and temperature and light level logging using COSM and the Pi Cobbler, I’ve wanted to compact […]
This blog was a life saver as theAdafruit also did not work for me. I also had to use the one from Mat. I have the date and IP address working but cannot get the degree sign to work as I think I need to add as a special character. Where can I download your python example for above script? Or get an explanation for how to do? Thanks a million these tutorials are great for beginners
Very pleased the blog helped you. I haven’t made my script available because it is highly customised to my setup.
But doing the degree sign is not that hard.
Somewhere near the top of your script add…
degree = chr(223)Then, just use the variable degree when defining your lcd_string. For example, mine for displaying the Outside temperature is:
lcd_string('Outside:%s %sC' % (data1,degree))Feel silly now but works a treat thanks!! :-D
No need to feel silly. It took me quite a lot of googling to find out how to do that :)
There’s a whole character set you can use with one of these LCDs…
http://symlink.dk/electro/hd44780/
Actually, the binary references on page 17 of this datasheet are more useful
(11011111 = 223 = degree)
http://www.adafruit.com/datasheets/HD44780.pdf
And there’s an interesting site here where you can define your own characters…
http://www.quinapalus.com/hd44780udg.html
I’ve not tried that though
Now that’s what I call a reply. I think you might be hearing more from me in the future…….
I will work through more of your examples. Many thanks again! :heh:
I have same this issue , from my test show you in VDO , please help http://www.youtube.com/watch?v=M4HTdcjGW9I
I solved mine by using the driver above. I haven’t played with it at all since I got my weather station working. I don’t think I can be of much help. Hope someone else will chip in. :)
Hi mate, great post! I’ve got my screen working perfectly with the Adafruit drivers (though I might give the other ones a go at some stage to see how they work), however, I’m interested to know how you handled the switching between screens?
I’ve currently got 2 screens I’m displaying, Screen 1 which displays time and date, and also the output of my temp sensor. Screen 2 displays current Bitcoin price. I’m switching between the two by using a for loop nested inside an infinite while loop:
while 1:
#loop that triggers 10 times, updating the screen every second
if loopcount <10:
lcd.home()
lcd.message(show_screen1_stuff)
lcd.message(show_more_screen1_tuff )
loopcount = loopcount+1
sleep(1)
#loop that displays static output for 10 seconds, resetting the loop trigger back to 0
else:
lcd.clear()
lcd.message(' show_screen2_stuff')
lcd.message('show_more_screen2_stuff)
sleep(10)
lcd.clear()
loopcount=0
As you can probably see, this works fine for 2 screens, but if I ever want to show 3 or more I could run in to issues. Any ideas would be appreciated
Not really sure what the problem is?
If you want to have three screens you can do it like this:
if loopcount = 10 < 20
#do other stuff stuff
loopcount++
else:
#do last stuff
loopcount++
loopcount=0
I use a button to switch between the screens (and also to turn off the screen when I don't want it). I use an array with the different button states, and a variable that stores the current state. Whenever the button is pressed, I just iterate through the array. This way you can easily add more screens without a lot of work.
Only problem is: When you use a delay, the code cannot check if a button was pressed. So I created my own "sleep"-function that checks every 0.1 seconds if the button was pressed until the delay is over. When the button was pressed, the "current state" changes and the function returns a true-value, so that the loop can be stopped and start all over again… (It's all done in python though)….
This is an example of where you’d need to use threading – you’d have a separate thread updating each of the screens, and the ‘main’ part of your code would just start up the separate threads, and then loop forever just sleeping.
https://duckduckgo.com/?q=python+threading+example
I want python code for this tutorial anyone know that from where I can get it.please tell me if anyone know that.
Thanks
https://duckduckgo.com/?q=16×2+LCD+raspberry+pi+python seems to have quite a selection to choose from….
Hi Alex coud you please post the python code ? Thanks a lot
Why is there a screw in your CPU?
To make people laugh