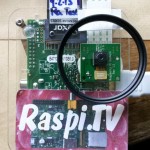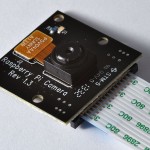
I went to visit the Raspberry Pi Foundation in Cambridge on Friday. It was really nice to finally meet Liz and the ever-growing team. We exchanged “black boards”. I gave them samples of some prototypes I’ve been working on, and they gave me one of the new Pi NoIR camera boards with “No IR” filter. I tried it out with John (who’s been working with Gordon on solving the USB issues). It works exactly the same way as the green PiCam. The only difference is that, because there’s no infra-red filter, daytime colours look a […more…]
A few people have been asking me about the RasPiCamcorder software. My original plan was to partner with a well known supplier and offer a “build your own RasPiCamcorder” kit, along with software and instructions, as a product. The software was always going to be open sourced though. But the market said NO! Many people have argued with the market and lost. I don’t intend to. There simply weren’t many takers for it. Cool though it is to be able to Dropbox your photos and videos, having neither sound nor screen seems to be enough […more…]
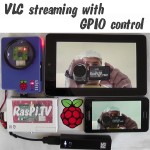
Having managed to get VLC streaming from Pi Camera to Nexus 7 Android tablet working, it was only a matter of time before I wanted to stream from the RasPiCamcorder. But when I tried it, I came across an annoying problem. RPi.GPIO needs to run as root (that’s why we always use sudo for our GPIO stuff) But VLC refuses to run as root. This means you can’t run them both from the same program. There’s all sorts of clever solutions people proposed (and I wasted a lot of time unsuccessfully trying them all out) […more…]
I wanted to be able to upload photos from my RasPiCamcorder straight to DropBox. So I did a little research and came across an absolute gem of a program called Dropbox-Uploader, by Andrea Fabrizi. A truly brilliant piece of work that gives you access to your DropBox account right from the command line. You do have to jump through a couple of hoops to get it set up (security mostly), but once you’ve done that, it’s a breeze. 1. DropBox account First of all you need a DropBox account. Hop on over to DropBox and […more…]
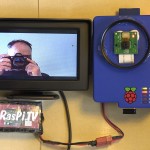
This blog is about the very much improved version 2 of the RasPiCamcorder. I originally built a quick and dirty free-standing camcorder two days after the Raspberry Pi camera was launched. I was in a hurry, as there was a Cambridge Jam two days later. Major novelty factor. It worked ok and it looks like this… Now we need buttons Later on I thought it’d be nice to have one that booted straight into camcorder mode and had buttons to control it with, so you don’t need an additional device to use it. I’ve also […more…]
In the 4 weeks since the Pi camera came out, I’ve spent a fair amount of time testing and fiddling with different things. I’ve also made two RasPiCamcorders – I hope to document the Mk2 version soon. It’s the reason I haven’t blogged much in the last week. I’ve been working on the hardware and software for it. One thing I hadn’t done until this week was test out the various settings for exposure compensation and white balance. Previously, I’d only used the automatic settings, which work pretty well. But there are some circumstances where […more…]
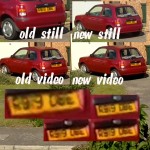
In the previous comparison I did a week or two ago, the resolution of video and stills output was compared. With respect to reading a car license plate from across the street, there was precious little to choose between the output. With the latest release of the camera drivers, (sudo apt-get update && sudo apt-get upgrade) I took the opportunity to run the test again with both old and new drivers. The most noticeable change is that the field of view of the stills is much greater. It transpired that the previous stills output was […more…]
I just got back from a week in France. While I was away I had a Raspberry Pi camera shoot a photo of the garden every ten minutes. I set it on for ten days, the day before we left. It still has a day or so to run, but I FTPed the first 1300 .jpg files from my Pi while it’s still running and made them into a video using Videopad. (You can also do this natively on the Pi with FFMPEG, but I haven’t played with that yet.) The subject matter isn’t the […more…]
The Raspberry Pi Camera is a fixed focus module, so that anything from about 0.5m to infinity is acceptably sharp. This has strengths and weaknesses, as with every design decision. The weakness in this case is that if you want to film or photograph anything closer than about 50-75cm it will be out of focus. With large SLR cameras, what people do is change the lens for a macro or close-up lens. We can’t do that easily. The other (cheaper, but generally less good) option photographers use is to add a small, screw-in, close-up magnifying […more…]
This is going to be short and sweet. I picked it up from a video by the Marvellous Matthew Manning (reminds me of the “marvellous mechanical mouse organ” from Bagpuss – Google it if you need to ask) otherwise known as RaspberryPi4Beginners. Matt’s made a video which complements several of my recent blogs about the Raspberry Pi Camera. His channel is Raspberry Pi For Beginners, but that doesn’t mean that only beginners can learn something from it. I learnt this alternative way of wrapping an .h264 stream to .mp4. It’s much simpler than using FFMPEG […more…]