A few people have been asking me about the RasPiCamcorder software. My original plan was to partner with a well known supplier and offer a “build your own RasPiCamcorder” kit, along with software and instructions, as a product. The software was always going to be open sourced though. But the market said NO! Many people have argued with the market and lost. I don’t intend to. There simply weren’t many takers for it. Cool though it is to be able to Dropbox your photos and videos, having neither sound nor screen seems to be enough […more…]
Having managed to get VLC streaming from Pi Camera to Nexus 7 Android tablet working, it was only a matter of time before I wanted to stream from the RasPiCamcorder. But when I tried it, I came across an annoying problem. RPi.GPIO needs to run as root (that’s why we always use sudo for our GPIO stuff) But VLC refuses to run as root. This means you can’t run them both from the same program. There’s all sorts of clever solutions people proposed (and I wasted a lot of time unsuccessfully trying them all out) […more…]
I wanted to be able to upload photos from my RasPiCamcorder straight to DropBox. So I did a little research and came across an absolute gem of a program called Dropbox-Uploader, by Andrea Fabrizi. A truly brilliant piece of work that gives you access to your DropBox account right from the command line. You do have to jump through a couple of hoops to get it set up (security mostly), but once you’ve done that, it’s a breeze. 1. DropBox account First of all you need a DropBox account. Hop on over to DropBox and […more…]
In this article, I’ll show you how to hook up and control a port expander chip with wiringpi2 for python. It’s really easy, and once set up (with about 3 lines of code) you can control your new ports just the same way as if they were on the Pi itself. This is, so far, my favourite new feature of WiringPi2 for Python – although there are some I have yet to play with. This is part 3 of my wiringpi2 for python series. If you haven’t read parts 1 & 2 yet, I recommend […more…]
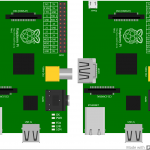
Over the last few days, the guys at Fritzing have been busy – they’ve released three new versions in three days. What’s Fritzing? I hear you ask. It’s an excellent Free Open Source program for doing circuit diagrams, board design etc. I use it a lot for my circuit diagrams on RasPi.TV. New Raspberry Pi models and graphics But what is of particular interest to me and possibly to you also, is that there are now new models for Raspberry Pi model B (rev 1 and rev 2). The graphics are beautifully done and all […more…]
This is part 2 in a series on WiringPi 2 for Python. The basics are covered in part 1 (click here). You should read that first if you haven’t already, as we build on it here in part 2. Today we’ll cover three things… 1. Raspberry Pi board revision checking with WiringPi2 for Python 2. Using the Raspberry Pi’s internal pull-ups and pull-downs with WiringPi2 for Python 3. Using hardware PWM with WiringPi2 for Python 1. Checking your Raspberry Pi board revision number in WiringPi2 It’s quite useful to be able to check what version […more…]
Basic Input/Output with WiringPi 2 What is WiringPi2 and why do I need it? WiringPi2 for Python is an excellent GPIO handling system written by Gordon ‘Drogon’ Henderson and packaged for Python by Phil ‘Gadgetoid’ Howard. It uses Arduino-like scripting language. For simple GPIO work, I still tend to use RPi.GPIO because that’s what I first got started with, but WiringPi is a very good alternative. It currently has more features. One of the reasons (I think) the take-up for WiringPi-Python has been a bit slow, despite its richer feature set, is the lack of […more…]
In the previous six articles, we’ve covered the basics of RPi.GPIO. I hope the series has been useful. While I was doing the “recap” for part 6, I decided to make myself a quick reference “cheat sheet” with all the common RPi.GPIO stuff in it. I figured this would be useful and save me having to look things up on the web and in previous Python scripts I’ve written. I made it as a text file that I can just copy and paste snippets of code from to make RPi.GPIO Python coding easier. Then I […more…]
Today, it’s time for us to combine inputs and outputs into the same script. It’s nothing scary and it’s not new either. It’s simply a case of doing what we’ve already done in the last two days’ of GPIO basics, but combining them. To make it super-easy, we’ll even stick to the same port numbers we used for the last two days. We’re going to make a new program which takes parts from both the “read a button press” and the “flash an led every half second” programs. We’re going to make a simple new […more…]
Today is output day. I’m going to show you how to switch things on and off using RPi.GPIO to control the output ports of the Raspberry Pi. Once you can control outputs, you can, with a few additional electronic components, switch virtually anything on and off. Given the Raspberry Pi’s excellent connectivity, this means you can switch things on and off through the internet, using any computer, smartphone or tablet from anywhere in the world. You can also use a local network, Bluetooth etc. for short-range control. Setting up is very similar to the way […more…]