Jul 232013
 
How to use WiringPi2 for Python on the Raspberry Pi in Raspbian part 1

Basic Input/Output with WiringPi 2 What is WiringPi2 and why do I need it? WiringPi2 for Python is an excellent GPIO handling system written by Gordon ‘Drogon’ Henderson and packaged for Python by Phil ‘Gadgetoid’ Howard. It uses Arduino-like scripting language. For simple GPIO work, I still tend to use RPi.GPIO because that’s what I first got started with, but WiringPi is a very good alternative. It currently has more features. One of the reasons (I think) the take-up for WiringPi-Python has been a bit slow, despite its richer feature set, is the lack of […more…]

Jul 192013
 
RPi.GPIO basics 7 – RPi.GPIO cheat sheet and pointers to RPi GPIO advanced tutorials

In the previous six articles, we’ve covered the basics of RPi.GPIO. I hope the series has been useful. While I was doing the “recap” for part 6, I decided to make myself a quick reference “cheat sheet” with all the common RPi.GPIO stuff in it. I figured this would be useful and save me having to look things up on the web and in previous Python scripts I’ve written. I made it as a text file that I can just copy and paste snippets of code from to make RPi.GPIO Python coding easier. Then I […more…]

Jul 172013
 
RPi.GPIO basics 6 – Using inputs and outputs together with RPi.GPIO - pull-ups and pull-downs

Today, it’s time for us to combine inputs and outputs into the same script. It’s nothing scary and it’s not new either. It’s simply a case of doing what we’ve already done in the last two days’ of GPIO basics, but combining them. To make it super-easy, we’ll even stick to the same port numbers we used for the last two days. We’re going to make a new program which takes parts from both the “read a button press” and the “flash an led every half second” programs. We’re going to make a simple new […more…]

Jul 152013
 
RPi.GPIO basics 5 – Setting up and using outputs with RPi.GPIO

Today is output day. I’m going to show you how to switch things on and off using RPi.GPIO to control the output ports of the Raspberry Pi. Once you can control outputs, you can, with a few additional electronic components, switch virtually anything on and off. Given the Raspberry Pi’s excellent connectivity, this means you can switch things on and off through the internet, using any computer, smartphone or tablet from anywhere in the world. You can also use a local network, Bluetooth etc. for short-range control. Setting up is very similar to the way […more…]

Jul 142013
 
RPi.GPIO basics 4 - Setting up RPi.GPIO, numbering systems and inputs

Well, today is the day we actually get to use RPi.GPIO a little bit. But, before we get to that, you should know about the two different numbering systems you can use with RPi.GPIO. If you take a look at the main GPIO header (P1) of the Raspberry Pi, you’ll see that there are 26 pins. The top left pin (as we look at this photo) is called pin 1, the one to the right of it is pin 2. So the next row is 3, 4 etc. and on down to 25, 26. This […more…]

Jul 132013
 
RPi.GPIO basics 3 - How to Exit GPIO programs cleanly, avoid warnings and protect your Pi

You might think I’m going about this series in a funny way. You’d be right! I am. That’s because I’m trying to highlight the bits that people don’t read about in other tutorials/documentation/manuals/books. These bits are useful, important and often overlooked. If I covered inputs and outputs first, you might not get to the rest because you’d already “know all I need”. That’s only partially true though. Although you can get away with not knowing or using this stuff, it’s much better and safer if you know it and use it. So today we’re focussing […more…]

Jul 122013
 
RPi.GPIO basics 2 – how to check what Pi board Revision you have

It all started in September 2012. The Raspberry Pi Foundation went and made some improvements to the Pi. How dare they!! ;) Seriously, though, there were some significant improvements to the Pi and a Rev 2 version was launched with double the RAM and some other changes/additions/improvements. This threw up some minor headaches for developers because some of the GPIO pinouts were changed and some new GPIO ports were made available on a brand new “solder it yourself if you want it” header called P5 (see the leaning header of Pi5a) GPIO 0 became GPIO […more…]

Jul 112013
 
RPi.GPIO basics 1 - how to check what RPi.GPIO version you have

It struck me the other day that I’ve published some fairly advanced RPi.GPIO tutorials, (e.g. interrupts and PWM) but not done anything more basic, apart from the Gertboard examples. So here’s an attempt to remedy that situation. Over the next few days, we’re going to have a walk around Ben Croston’s RPi.GPIO, which is now at version 0.5.3a. Some of this stuff may be new to you even if you’ve been using RPi.GPIO’s more advanced features, so it’s worth having a look. What is RPi.GPIO? It’s an easy way of controlling the Pi’s General Purpose […more…]

Jun 242013
 
RasPiCamCorder 2 - standalone raspberry pi camcorder with buttons, screen and DropBox capability

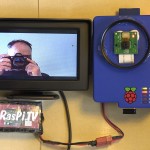
This blog is about the very much improved version 2 of the RasPiCamcorder. I originally built a quick and dirty free-standing camcorder two days after the Raspberry Pi camera was launched. I was in a hurry, as there was a Cambridge Jam two days later. Major novelty factor. It worked ok and it looks like this… Now we need buttons Later on I thought it’d be nice to have one that booted straight into camcorder mode and had buttons to control it with, so you don’t need an additional device to use it. I’ve also […more…]

Jun 192013
 
Pi duration tests and review of two new lithium battery packs

I’ve got a couple of new battery packs in from RS. As part of my testing, I wanted to see how long they could power a Pi at idle, with nothing but the battery pack and an Edimax wifi dongle connected. I know how much power this uses because I’ve made measurements in the past. Model B with just Edimax = 2.0 Watts at idle Model A with just Edimax = 0.81 Watts at idle (included for completeness – this test is on model B) I just want to know roughly how long it lasts […more…]