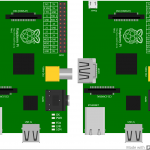
Over the last few days, the guys at Fritzing have been busy – they’ve released three new versions in three days. What’s Fritzing? I hear you ask. It’s an excellent Free Open Source program for doing circuit diagrams, board design etc. I use it a lot for my circuit diagrams on RasPi.TV. New Raspberry Pi models and graphics But what is of particular interest to me and possibly to you also, is that there are now new models for Raspberry Pi model B (rev 1 and rev 2). The graphics are beautifully done and all […more…]
This is part 2 in a series on WiringPi 2 for Python. The basics are covered in part 1 (click here). You should read that first if you haven’t already, as we build on it here in part 2. Today we’ll cover three things… 1. Raspberry Pi board revision checking with WiringPi2 for Python 2. Using the Raspberry Pi’s internal pull-ups and pull-downs with WiringPi2 for Python 3. Using hardware PWM with WiringPi2 for Python 1. Checking your Raspberry Pi board revision number in WiringPi2 It’s quite useful to be able to check what version […more…]
This is a video review/tutorial of the ISO-TECH IPS 3303D DC bench power supply from RS components. It has 2 variable outputs (30V, 3 Amps) which can be connected in series or in parallel to double up the voltage/current. It also has one fixed output with three settings (2.5V/3.3V/5V – up to 3 Amps). I used it on 5V to power a RasPiCamcorder while I filmed this video. You can also control it with a computer via USB, but I haven’t tried that (yet). But this is meant to be a video review, so that’s […more…]
In the previous six articles, we’ve covered the basics of RPi.GPIO. I hope the series has been useful. While I was doing the “recap” for part 6, I decided to make myself a quick reference “cheat sheet” with all the common RPi.GPIO stuff in it. I figured this would be useful and save me having to look things up on the web and in previous Python scripts I’ve written. I made it as a text file that I can just copy and paste snippets of code from to make RPi.GPIO Python coding easier. Then I […more…]
This blog is about the very much improved version 2 of the RasPiCamcorder. I originally built a quick and dirty free-standing camcorder two days after the Raspberry Pi camera was launched. I was in a hurry, as there was a Cambridge Jam two days later. Major novelty factor. It worked ok and it looks like this… Now we need buttons Later on I thought it’d be nice to have one that booted straight into camcorder mode and had buttons to control it with, so you don’t need an additional device to use it. I’ve also […more…]
In the 4 weeks since the Pi camera came out, I’ve spent a fair amount of time testing and fiddling with different things. I’ve also made two RasPiCamcorders – I hope to document the Mk2 version soon. It’s the reason I haven’t blogged much in the last week. I’ve been working on the hardware and software for it. One thing I hadn’t done until this week was test out the various settings for exposure compensation and white balance. Previously, I’d only used the automatic settings, which work pretty well. But there are some circumstances where […more…]
On day 2 of Raspberry Pi Camera ownership I decided it was time to make the new RasPiCam into a camcorder that could be taken anywhere and used to shoot video. Hold on, there’s issues with that aren’t there? Sure there are, but there’s ways round ’em too ;) So here’s how I did it. I’ll be taking this to the Cambridge Jam tomorrow. :) Ingredients 1 Switching regulator 1 Bluetooth serial adaptor 1 Raspberry Pi with latest updated Raspbian 1 Raspberry Pi Camera Connectors for battery, reg and Bluetooth adaptor 1 power source (I’m […more…]
A multimeter is the Swiss Army Knife of electronics. You really do need one to debug your circuits when things aren’t working. GRRRRRR! Where is that dodgy connection? I’ve managed for years with a very cheap multimeter, but recently RS Components sent me this ISO-TECH IDM99III for review. Could it be “the one”? My brief is “an honest video review”. I receive no payment or kickback for doing this, but I do get to keep the product. I’m getting quite a lot of stuff in for review at the moment, from lots of different sources. […more…]
In part 1 of this series, we looked at the basic commands for using software pulse-width modulation (PWM) in RPi.GPIO 0.5.2a and higher. In this article we’ll get a bit more hands-on and into some practical applications for it. It’s all very well being able to make nice square-wave pulses on an oscilloscope, but what’s it actually useful for? Our servo said? EEEEH AAAAH I tried using RPi.GPIO soft PWM with servos in response to a query after the last article, but, although it did change the servo positions, it was jittery. Servos require quite […more…]
Mike Brojak from DesignSpark, whose voice you can hear in the video, asked me to put together a Wii controller flag-waving demo (plus other bits) on their new PiGo board. You may remember catching a glimpse of it in the flag waving video I produced a few weeks ago? This demo was destined for the Electronica exhibition in Shanghai, and I’ve just received a link to a little video the guys shot while they were there. (Thanks Yan :) ) Apparently it was well received, worked really well and only needed rebooting once in three […more…]